The Charger Problem Nobody Talks About Until the Cart Stops Charging
Golf Cart Battery Charger Not Working? Here is a scenario that happens constantly. A golf cart owner notices their cart does not feel as powerful as usual. Range has dropped. Maybe it felt sluggish this morning. They assume the batteries are dying and call their local shop to price out a new battery pack — a $1,000 to $1,600 investment. The shop replaces the pack. Two months later, the new batteries are already underperforming. The real culprit, which nobody checked at any point in this process? The charger.
A failing golf cart charger that is not delivering its rated voltage and current can silently undercharge a battery pack for months or years. The batteries appear to charge — the charger turns on, runs its cycle, shuts off — but the pack is never reaching full charge. Over time, the chronic undercharge causes sulfation, the batteries lose capacity, and eventually they appear to fail. The owner replaces the batteries. The bad charger begins doing the same thing to the new pack.
We see this pattern in our customer support calls more often than we should, and it happens because charger diagnosis is genuinely less intuitive than battery diagnosis. Batteries are easy to check with a voltmeter. Charger problems require understanding what a correct charging cycle looks like, what the numbers should be at different stages, and what the error codes on more sophisticated chargers are actually telling you.
This guide gives you that knowledge. We cover every common golf cart charger failure mode, the complete OBC error code reference for EZGO and Club Car, the Lester and Delta-Q charger diagnostic procedures, and a definitive repair-vs-replace decision framework that tells you when a charger is worth fixing and when to stop spending money on it and buy a quality replacement.
Table of Contents
| QUICK ANSWERGolf cart charger not working — where to start?Step 1 — Check the AC power source: Test the wall outlet with a different device. Check the breaker. A charger that appears dead may simply have no incoming power.Step 2 — Check the DC output connectors: Corroded or loose charge port pins are the most common cause of chargers that run but do not charge the batteries. Inspect and clean before deeper diagnosis.Step 3 — Read the error code: EZGO, Club Car Precedent, and modern Lester/Delta-Q chargers all communicate fault codes via LED blink patterns or digital displays. Read the code before touching anything else.Step 4 — Test output voltage: A working charger should output voltage measurably above the pack voltage within 30-60 seconds of initiating. A charger that shows 0V or pack voltage only at the output terminals has lost its ability to push current into the pack. |
How Golf Cart Chargers Actually Work: The Basics You Need for Diagnosis
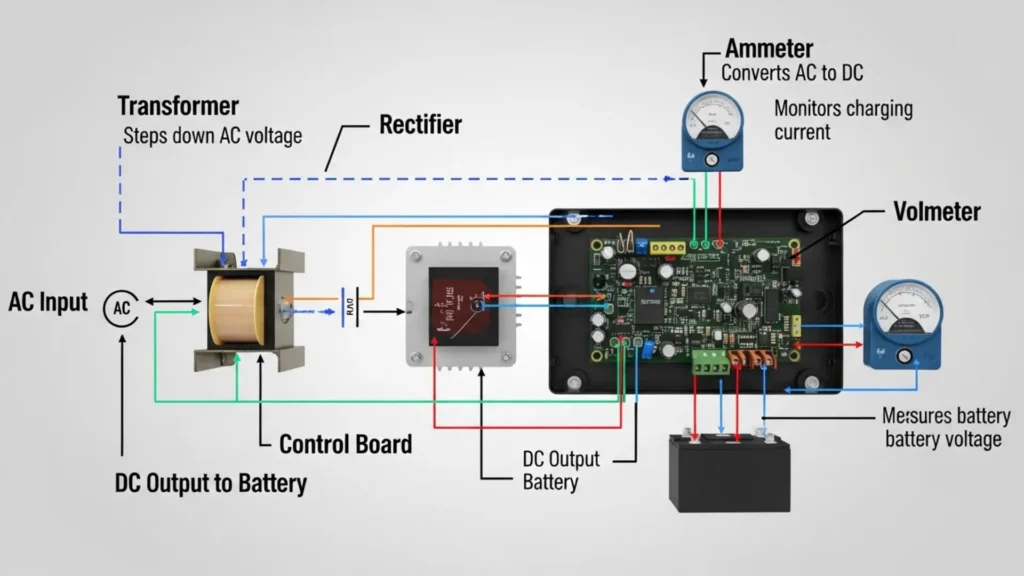
Before you can diagnose a charger, you need to understand what a correctly working charger is supposed to do. Golf cart chargers are not simple transformers that push a fixed voltage into the battery pack — they are programmable power converters that deliver a precisely controlled current and voltage profile over a multi-stage charging cycle.
The standard profile for a flooded lead-acid golf cart charger has three stages. In the bulk stage, the charger pushes maximum rated current (typically 15-25 amps depending on the charger model) into the pack until the pack voltage reaches a target absorption voltage — approximately 58.4V to 59.5V for a 48V system. In the absorption stage, the charger holds that target voltage while the current tapers naturally as the pack approaches full charge. In the float stage, the charger drops to a maintenance voltage (typically 54-56V for a 48V system) to keep the pack fully charged without overcharging.
This three-stage sequence is not optional — it is fundamental to battery health. A charger that gets stuck in bulk stage (never reaching absorption) leaves the pack chronically undercharged. A charger that never drops to float keeps pushing current into a full pack, overcharging it and accelerating plate corrosion and electrolyte loss. A charger that skips stages or outputs incorrect voltages at each stage is silently damaging the batteries every cycle.
Modern OBC-equipped chargers add a fourth layer: communication with the cart’s On-Board Computer. The OBC monitors battery pack temperature, voltage, and sometimes individual cell health, and communicates charge parameters back to the charger in real time. A fault in this OBC communication chain can prevent charging entirely even when both the charger and the batteries are physically functional — which is why OBC error codes are the first thing to check on any Precedent or post-2007 EZGO that stops accepting charge.
Types of Golf Cart Chargers and Their Diagnostic Approach
| Charger Type | Common Brands | OBC Required? | Primary Diagnostic Method |
| Standard auto charger (non-OBC) | Schauer, older EZGO PowerDrive, Trojan | No | Multimeter output voltage test. Check AC input, DC output at both idle and under-load conditions. No codes to read. |
| OBC-communicating charger (EZGO Powerwise) | EZGO Powerwise II, Powerwise QE | Yes (EZGO) | LED blink code on charger port LED or status light. Code sequence identifies fault. OBC must be functional for charging to initiate. |
| OBC-communicating charger (Club Car PowerDrive) | Club Car PowerDrive Plus 2/3/4 | Yes (CC Precedent) | OBC fault code read via diagnostic port on Precedent. PowerDrive Plus has LED indicator. See Club Car OBC code table in Section 4. |
| Smart charger (algorithm-selectable) | Lester Summit II, Delta-Q IC650 | Selectable | Built-in LED status display or digital fault indicator. Lester shows fault codes directly on display. Delta-Q uses blink patterns. Full manuals available. |
| Onboard charger (integrated into cart) | Some Club Car Onward, EZGO ELiTE | Yes (integrated) | Fault codes read through vehicle diagnostic port. Requires OBD-compatible tool or manufacturer diagnostic software. Most require dealer tools. |
Symptom-First Diagnosis: What Your Charger’s Behaviour Is Telling You
Different charger failure modes produce different observable symptoms. Use this table to identify your most likely fault before reaching for a multimeter or reading error codes.
| Symptom | Most Likely Cause | Diagnosis Path |
| Charger completely dead — no fan, no lights, nothing | No AC power, blown internal fuse, dead transformer | Test wall outlet first. Then check AC inlet fuse in charger housing (usually accessible). If outlet is live and fuse is intact, internal transformer or bridge rectifier has failed. |
| Charger runs briefly (1-3 min) then shuts off | Battery pack voltage too low for charger to recognise; OBC fault; thermal shutoff | Measure pack voltage — if below 36V on a 48V system, the pack is deeply discharged past the charger’s activation threshold. Try a manual recovery charge. If pack voltage is normal, read OBC error codes. |
| Charger runs full cycle but pack stays undercharged | Charger not reaching target absorption voltage; sulfated pack absorbing less current | Measure charger output voltage at the end of the bulk stage. If not reaching 58.4V+ on a 48V system, the charger’s voltage regulation circuit is failing. If voltage is correct but current stays high, the pack has sulfated cells. |
| Charger never shuts off — runs continuously | Charge termination circuit failed; OBC not sending completion signal; one dead battery cell | Measure each battery individually. A cell that cannot hold charge keeps pack voltage low, preventing termination signal. If batteries are healthy, the charger’s termination circuit or OBC communication is faulty. |
| Charger initiates, clicks off after 10-30 seconds | OBC communication timeout; charge port connection problem; safety interlock fault | Inspect the charge port pins for corrosion or damage. Clean and retest. If fault persists, read OBC error codes — this symptom frequently indicates an OBC fault code 1 (low battery) or code 7 (communication error). |
| Charger output voltage correct but current very low | Sulfated battery pack reducing charge acceptance; corroded DC cables between charger and pack | Perform a battery load test. Severely sulfated batteries accept very little current even at correct charger voltage. Also check all DC cable connections between charger output and battery pack positive terminal. |
| Charger overheating, burning smell | Internal component failure; blocked ventilation; shorted battery cell creating excessive current draw | Disconnect immediately. Inspect ventilation slots for blockage. Measure each battery for shorted cell (voltage significantly lower than others at rest). Do not reconnect a charger that has produced a burning smell without internal inspection. |
| Correct voltage output but charger sparks when plugged in | Normal inrush current arc (minor, acceptable) OR severe battery sulfation creating very low impedance pack | Minor spark on connection is normal on some chargers. Significant arcing with large visible spark indicates abnormally low pack impedance — check for shorted battery cell before further charging. |
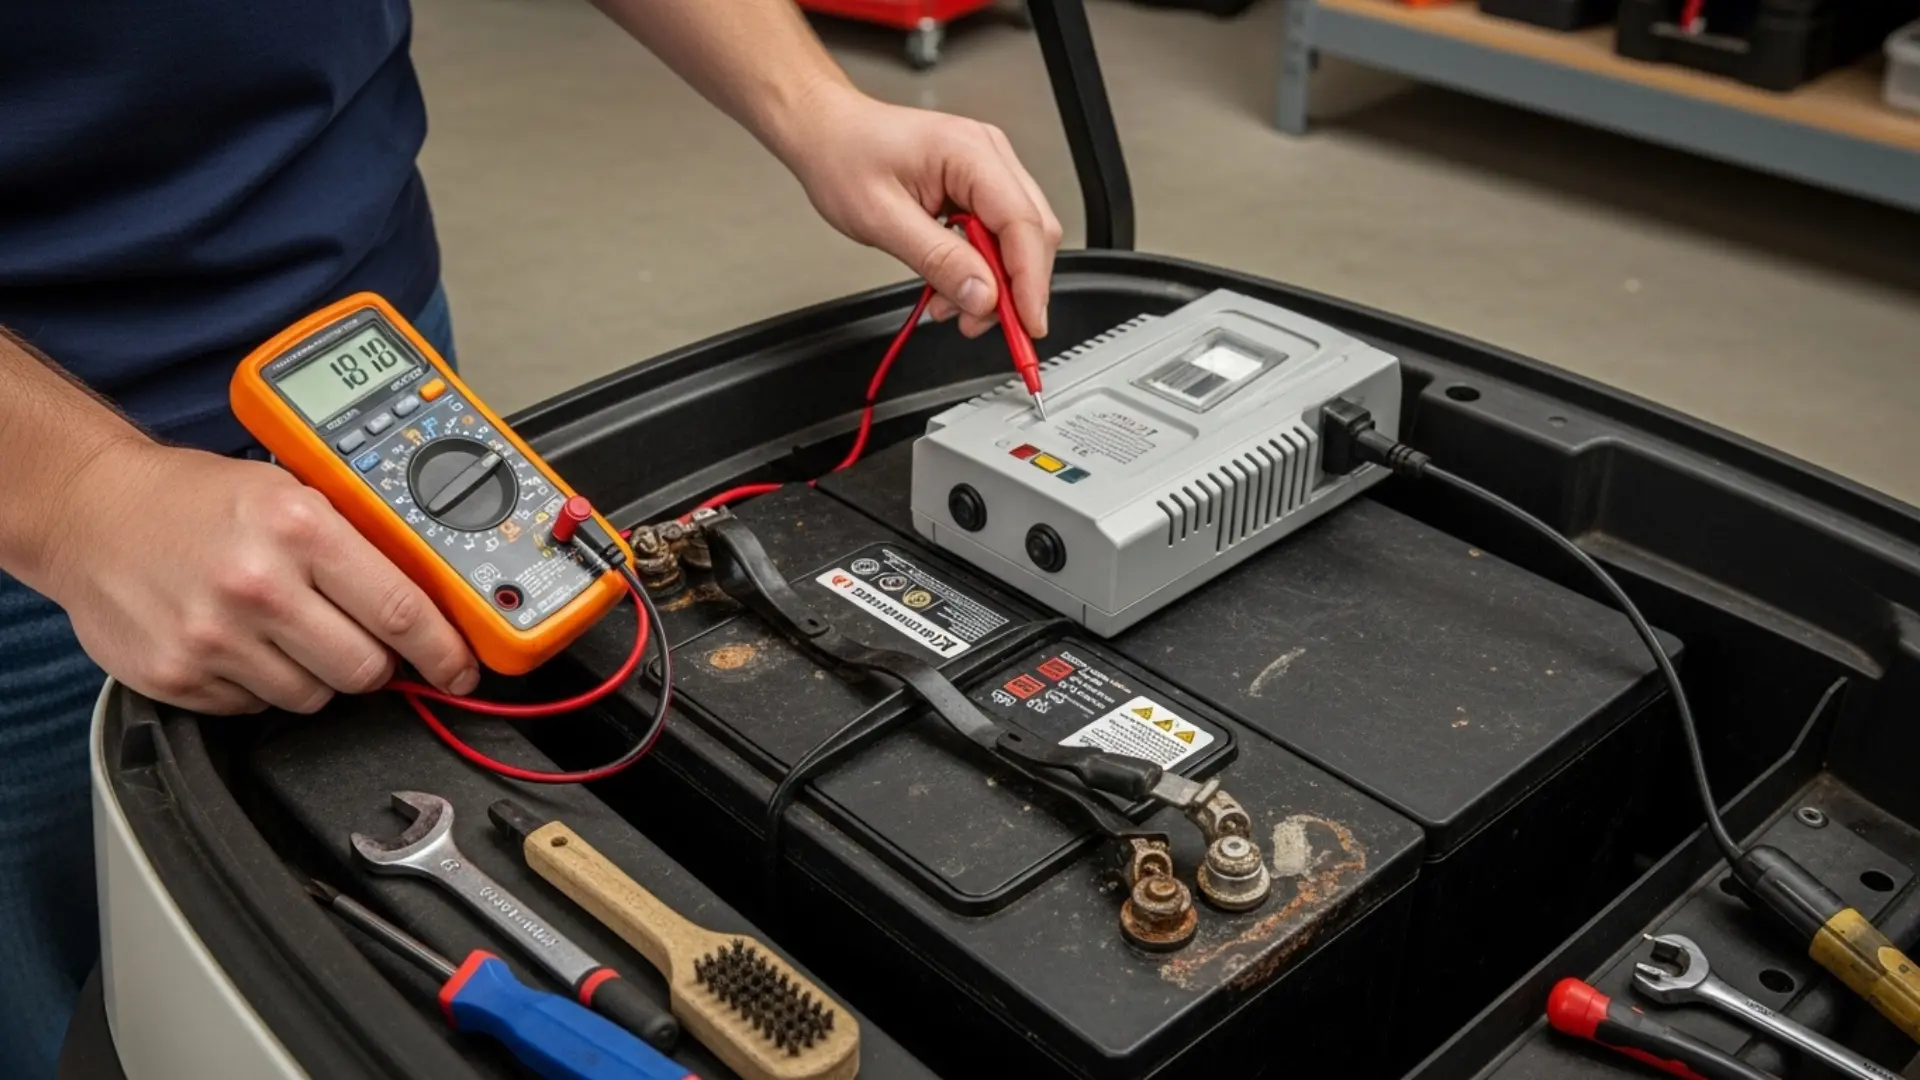
Testing Your Charger Output: The Multimeter Procedure

A basic digital multimeter set to DC voltage is all you need for the most important charger diagnostic tests. Here is the complete procedure for confirming whether your charger is producing correct output at each stage of the charging cycle.
Test 1: AC Input Voltage
- Set your multimeter to AC voltage, 200V range.
- Test the wall outlet your charger is plugged into — you should measure 110-125V AC. If significantly below this, the outlet has a wiring problem that is unrelated to the charger.
- Test at the charger’s AC input terminals if accessible (usually requires opening the charger housing). AC voltage should match the wall outlet. If significantly lower at the charger input than at the wall, the charger’s AC cord or input fuse has a fault.
Test 2: DC Output Voltage at Initiation
- Connect the charger to the cart’s charge port normally.
- Set multimeter to DC voltage, 100V range.
- Measure DC voltage directly across the positive and negative output terminals of the charger (the two large terminals at the charger connector).
- Within 60-90 seconds of charger startup, output voltage should be 5-10% above the nominal pack voltage: 50-53V on a 48V system during initial bulk charging, rising toward 58.4-59.5V as the pack charges.
- If output reads 0V or exactly matches resting pack voltage (indicating no current flow), the charger is not producing output — check DC output fuse and internal rectifier.
Test 3: Absorption Voltage Verification
This is the most critical test for diagnosing a charger that runs but undercharges. The absorption voltage is the target voltage the charger should maintain during the second stage of charging — when it is finishing the charge at reduced current. It should measure:
- 48V lead-acid system: 58.4V to 59.5V during absorption stage
- 36V lead-acid system: 43.8V to 44.7V during absorption stage
- 48V LiFePO4 system: 58.4V (fixed, no float stage on lithium)
If your charger’s absorption voltage is consistently 2V or more below these targets, the voltage regulation circuit has drifted or failed. This is the silent undercharging scenario that destroys battery packs. A charger measuring 56V instead of 58.5V during absorption is leaving the pack at roughly 80-85% charge every cycle — chronic undercharge that will cause sulfation within 6-12 months of regular use.
| TECH TIP | The easiest field test for chronic undercharging: after a full overnight charge, measure each battery in the pack with a voltmeter. If any 8-volt battery reads below 8.3V after a full charge cycle, either that battery has a failing cell OR the charger is not reaching its target absorption voltage. Test charger output voltage and battery static voltage together to distinguish between the two causes. |
EZGO OBC Error Codes: Complete Reference Guide
EZGO introduced its OBC (On Board Computer) charging system with the Powerwise II charger in 2007. The OBC communicates fault codes through LED blink patterns visible on the charger port LED or the status indicator on the charger itself. Reading these codes before replacing any component saves significant time and money — OBC faults frequently look like battery or charger failures when the actual problem is a communication issue, a connector corrosion problem, or a low-battery protection trigger.
To read EZGO blink codes: With the charger connected and in a fault state, count the number of LED flashes in a repeating pattern. The pattern repeats after a brief pause. The number of flashes in the pattern is the code number.
| Code # | Flash Pattern | Fault Indication | Diagnosis and Resolution |
| 1 | 1 flash | Low battery / discharge protection | Pack voltage is below the charger’s minimum initiation threshold (typically below 36V on a 48V system). Most common after extended storage or a deep discharge. Resolution: manually apply a brief direct charge to bring pack voltage above the threshold, then reconnect the OBC charger. If pack voltage is normal but code 1 persists, check OBC harness connector at battery pack. |
| 2 | 2 flashes | High battery / over-voltage | Pack voltage is above the charger’s safe initiation ceiling. Can indicate a reversed connection, a battery with a shorted cell (voltage abnormally high), or a prior overcharge event. Measure each battery individually to identify the anomaly before reconnecting charger. |
| 3 | 3 flashes | High current / overcurrent fault | Charger is detecting current draw above its rated maximum, typically indicating a shorted battery cell creating near-zero impedance in the pack. Measure each battery under a brief load to identify the shorted cell. Do not attempt to charge a pack with a shorted cell. |
| 4 | 4 flashes | Temperature fault | Battery pack or charger is operating outside the safe temperature range. Common in summer months on carts stored in direct sun. Allow the pack to cool to below 95 degrees Fahrenheit and retry. If fault persists in normal temperatures, the temperature sensor in the OBC harness may have failed. |
| 5 | 5 flashes | Timeout / charge not completing | The charger has been running for its maximum allowed time (typically 10-12 hours) without completing. Indicates severely sulfated batteries that are accepting charge very slowly, or a charger that is not reaching its absorption voltage target. Perform battery load test and charger absorption voltage test to determine root cause. |
| 6 | 6 flashes | Charger internal fault | Internal charger electronics have detected a hardware fault. This code indicates a charger problem rather than a battery or OBC problem. The charger requires repair or replacement. A 6-flash code is not resolvable through battery work or OBC reset. |
| 7 | 7 flashes | OBC communication fault | The charger cannot establish communication with the OBC. Most commonly caused by: corroded OBC connector pins at the charge port, a damaged OBC harness, or a failed OBC module. Clean the charge port pins with electrical contact cleaner and retest. If fault persists after cleaning, test OBC harness continuity. |
| 8 | 8 flashes | Charge port connection fault | Charger plug is not making proper contact with charge port. Inspect both the charger plug pins and the cart’s charge port receptacle for bent pins, corrosion, or physical damage. A pin cleaning kit resolves most code 8 faults. Replace charge port if pins are significantly damaged. |
| EZGO NOTE | EZGO revised its OBC fault code definitions between the Powerwise II (2007-2013) and Powerwise QE/QE2 (2014-present) generations. Code meanings in the table above apply to the most common Powerwise II platform. Always cross-reference with your specific cart’s service manual if you are working on a post-2014 model — a code 3 means different things on different generations. |
Club Car Precedent OBC Error Codes: Complete Reference
The Club Car Precedent uses a two-digit fault code system read through the OBC diagnostic port. Unlike EZGO’s single-number blink codes, Precedent codes consist of two numbers separated by a pause — for example, a fault code 3-1 means three flashes, pause, one flash. This gives the Club Car system a larger fault code vocabulary that provides more specific diagnosis.
To read Precedent OBC codes: Short the two small diagnostic terminals on the OBC diagnostic port under the seat with a paperclip or jumper wire. Turn the key to the ON position. The OBC LED will flash a two-part code sequence. Count both numbers carefully — the gap between the two parts of the code is shorter than the gap before the pattern repeats.
| Code | Fault Description | Diagnosis and Resolution |
| 1-1 | Low battery / pack voltage low | Pack voltage is below the OBC’s minimum threshold. Identical in cause and resolution to EZGO code 1 — deep discharge, extended storage, or severely failing battery. Manual recovery charge required. If pack voltage is actually normal, verify OBC harness connection at battery positive terminal. |
| 1-2 | High battery voltage | Pack voltage above safe ceiling. Check for overcharge from prior charging event, or measure individual batteries for a reversed polarity battery (installed backwards after replacement — more common than you would think). |
| 1-3 | High temperature — battery | Battery temperature sensor reading above threshold. Allow pack to cool below 95F. If fault persists in normal ambient temperatures, the temperature sensor in the OBC wiring harness has failed — sensor replacement resolves this without charger or battery replacement. |
| 1-4 | High temperature — charger | Charger internal temperature too high. Check that charger ventilation slots are clear of debris and that the charger is not in an enclosed space. Charger should be in open air during charging. If overheating persists in normal conditions, internal fan or thermal regulation has failed. |
| 2-1 | Charge port connection fault | OBC is not detecting a proper charger connection. Inspect charge port pins for corrosion, bending, or damage. Clean with electrical contact cleaner. This is the most common Precedent fault code and is almost always a physical connector issue, not an electronic fault. |
| 2-2 | Communication fault — OBC to charger | OBC and charger are not completing the handshake protocol. Can indicate: incorrect charger model (non-Club Car charger without OBC protocol), OBC harness damage, or OBC module failure. Confirm charger is a Club Car OBC-compatible model. Clean all connector pins. If fault persists with correct charger, OBC module may need replacement. |
| 3-1 | Solenoid fault | OBC is detecting an issue with the solenoid circuit — either the solenoid is not responding to activation commands or the feedback signal is absent. This code can appear during charging if the solenoid circuit shares the OBC harness with the charge detection circuit. Test solenoid coil resistance (should be 4-6 ohms on most Precedent solenoids). |
| 4-1 | Charge timeout / incomplete charge | Charge cycle ran for maximum allowed time without completing. Same root causes as EZGO code 5 — severely sulfated batteries or charger not reaching absorption voltage. Battery load test and charger output voltage test required to determine which component is the limiting factor. |
| 5-1 | Current fault during charging | Charger is drawing or delivering abnormal current. Check for a shorted battery cell in the pack (one battery with voltage significantly lower than others). Also inspect DC cables between charger and battery pack for hot spots indicating high-resistance connections. |
| 7-1 | OBC internal fault | OBC module has detected an internal hardware fault. This code cannot be resolved through external component work. OBC module replacement is required. Precedent OBC modules are available as replacement parts — this is a $150-$250 component replacement, not a full cart service. |
Lester Summit II and Delta-Q IC650: The Aftermarket Standard — Diagnosis Guide
The Lester Summit II and Delta-Q IC650 are the two most commonly recommended aftermarket charger upgrades, and they both include their own diagnostic displays that make fault identification significantly easier than OEM charger blink codes. Understanding what these displays are telling you is worth a dedicated section.
Lester Summit II Fault Codes
The Lester Summit II uses a numeric LED display that shows both the current charging status and any active fault codes. During normal operation it scrolls through: amperage output, pack voltage, and charge stage (bulk / absorb / float). When a fault occurs, the display shows a two or three character fault code.
| Display Code | Fault Meaning | Resolution |
| E01 | AC line fault / low AC voltage | Input AC voltage is too low (below 90V typically). Check outlet voltage with multimeter. Extension cord too long or too light gauge can cause this fault under load. |
| E02 | Battery low — pack below minimum threshold | Pack voltage below initiation threshold. Manual recovery charge or direct battery bypass charge required to bring pack voltage into range before Summit II will initiate normal cycle. |
| E03 | Battery voltage high | Pack voltage above safe ceiling. Check for prior overcharge event or a battery with internal fault causing elevated voltage. |
| E04 | Output fault — no current flow | Charger is producing output voltage but zero current is flowing. Most commonly caused by an open circuit in the DC output path — check charge cord, connector pins, and cable continuity. |
| E05 | Temperature fault | Internal charger temperature too high. Ensure ventilation slots are clear. Allow charger to cool 30 minutes and retry. If fault recurs immediately, internal thermal sensor or fan has failed. |
| E08 | Charge timeout | Charge cycle exceeded maximum time limit without completing. Battery load test required — severely sulfated or failing batteries that accept charge slowly trigger this fault. |
| E09 | Wrong battery type / profile mismatch | The selected charge profile does not match the connected battery type. Verify the Lester Summit II profile selection switch or DIP settings match your battery chemistry (FLA, AGM, or LiFePO4) and voltage (36V or 48V). |
Delta-Q IC650 Fault Blink Codes
The Delta-Q IC650 uses a red/green LED indicator on the charger body. During normal charging, the LED flashes green. Fault conditions produce red flash patterns that identify the fault type.
| LED Pattern | Fault | Resolution |
| Solid red | Hardware fault — charger requires service | Internal electronics fault. Charger requires service or replacement. A solid red with no blinking pattern is not a battery or connection fault — it is an electronics failure. |
| 1 red flash | Battery low — below initiation threshold | Same as EZGO code 1 and Lester E02 — pack voltage too low. Manual recovery charge required. |
| 2 red flashes | Over-voltage / battery too high | Pack voltage above safe charging ceiling. Measure individual batteries to identify anomaly. |
| 3 red flashes | Charge timeout | Maximum charge time exceeded without completion. Battery load test required. |
| 4 red flashes | Temperature fault | Over-temperature protection activated. Cool charger and batteries, then retry. |
| Green then red (alternating) | Algorithm / profile fault | The Delta-Q algorithm programming does not match the connected battery type. Verify the correct algorithm is loaded for your cart’s battery voltage and chemistry. Delta-Q algorithm reflashing requires the DQ Charge setup tool. |
Charge Port Inspection and Repair: The Most Overlooked Fix
The charge port — the receptacle on the cart that accepts the charger plug — is responsible for a disproportionate share of charging problems relative to how much attention it typically receives. The pins in the charge port are exposed to moisture, road grime, corrosion from battery acid vapour, and the physical wear of repeated plug connection and disconnection. Over time, this produces the classic symptoms of a charge port problem: the charger runs but shuts off quickly, produces code 2-1 on a Precedent, or produces EZGO code 8.
Diagnosis is simple. With the cart key off and the charger disconnected, visually inspect the charge port pins. Healthy pins are bright copper-coloured with a slight sheen. Corroded pins are dull, greenish-grey, or coated in white oxidation. Bent or damaged pins may show physical deformation.
Cleaning corroded charge port pins: use a small amount of electrical contact cleaner on a cotton swab or a soft brass-bristle brush. Work gently — the pins are spring-loaded and can be damaged by excessive pressure. After cleaning, apply a thin film of dielectric grease to the cleaned pins. This significantly slows re-oxidation. Reconnect the charger and test — in many cases, charge port cleaning is the complete fix for a fault that was misdiagnosed as a charger or battery problem.
If pins are physically bent, the charge port requires replacement. Charge port receptacles are available for all Club Car, EZGO, and Yamaha models at GolfCartGears.com. This is a 20-30 minute replacement job — the old port unbolts from the cart body, the three to four wires detach with spade connectors, and the new port reconnects in reverse order. No soldering required.
| TECH TIP | The single most common charger ‘fault’ that resolves with no parts replacement is a corroded charge port. In our experience, roughly 25-30% of all ‘charger not working’ calls we receive are resolved simply by cleaning the charge port pins and applying dielectric grease. Before replacing any component, spend 5 minutes inspecting and cleaning the charge port. It is the highest-return-per-minute diagnostic step in golf cart charging diagnosis. |
Common Charger Hardware Failures: What Can Be Repaired vs Replaced
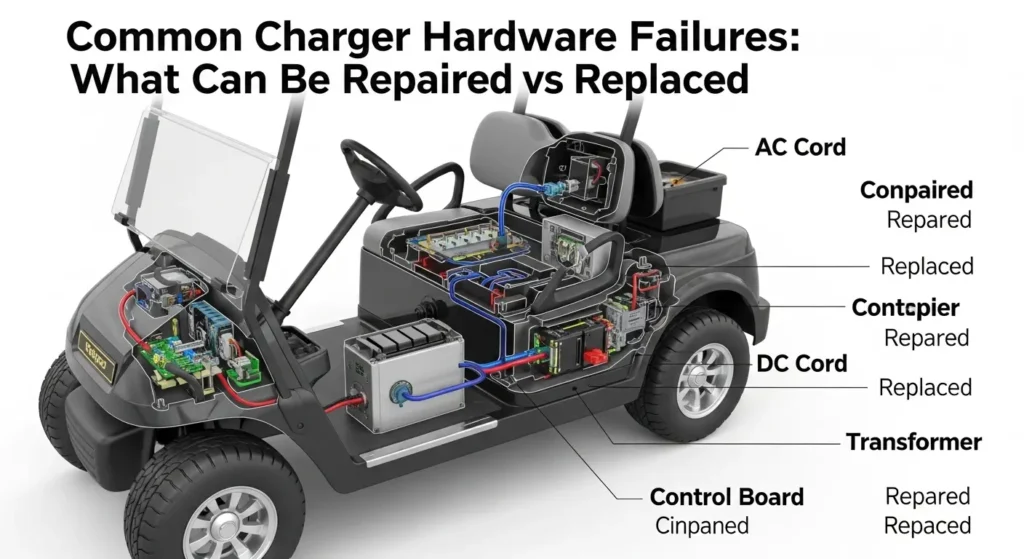
Not all charger failures require replacing the entire unit. Some are component-level repairs that a technically capable owner can perform at moderate cost. Here is an honest assessment of the most common hardware failures and the repair economics for each.
Blown Internal Fuse
Most golf cart chargers have one or more internal fuses — typically a slow-blow fuse on the AC input circuit and sometimes a fuse on the DC output circuit. These fuses blow when the charger experiences an overcurrent event, such as attempting to charge a shorted battery pack. A blown fuse costs $2-$8 to replace and takes 15 minutes once the charger housing is opened.
The critical step after a blown fuse is not just replacing the fuse — it is identifying why it blew. A fuse that blows immediately after replacement is protecting the circuit from an ongoing fault. Do not repeatedly replace blown fuses without diagnosing what caused the overcurrent event.
Failed Cooling Fan
Charger cooling fans run whenever the charger is operating and fail at a predictable rate after 5-8 years of service. A failed fan causes the charger’s thermal protection to trigger prematurely, producing temperature fault codes and premature charge termination. The charger appears to work but shuts off after 15-30 minutes on hot days or in warm garages.
Replacement cooling fans for most charger models cost $15-$40 and require opening the charger housing. The fan is typically held by two or four screws and connects via a two-wire harness. This is a legitimate DIY repair that extends charger life for years at minimal cost.
Corroded or Damaged Output Connector
The charger-side output connector — the plug that inserts into the cart’s charge port — experiences the same corrosion exposure as the charge port pins, plus the physical stress of repeated connection. Bent pins on the charger connector are a common cause of intermittent charging.
Charger output connectors for EZGO Powerwise, Club Car PowerDrive, and universal connectors are available as replacement parts. Depending on the charger model, the connector replacement may be a crimp-and-heat-shrink repair on the existing cable or a complete cable assembly replacement. This is typically a $15-$45 parts repair.
Failed Control Board (Repair vs Replace Decision Point)
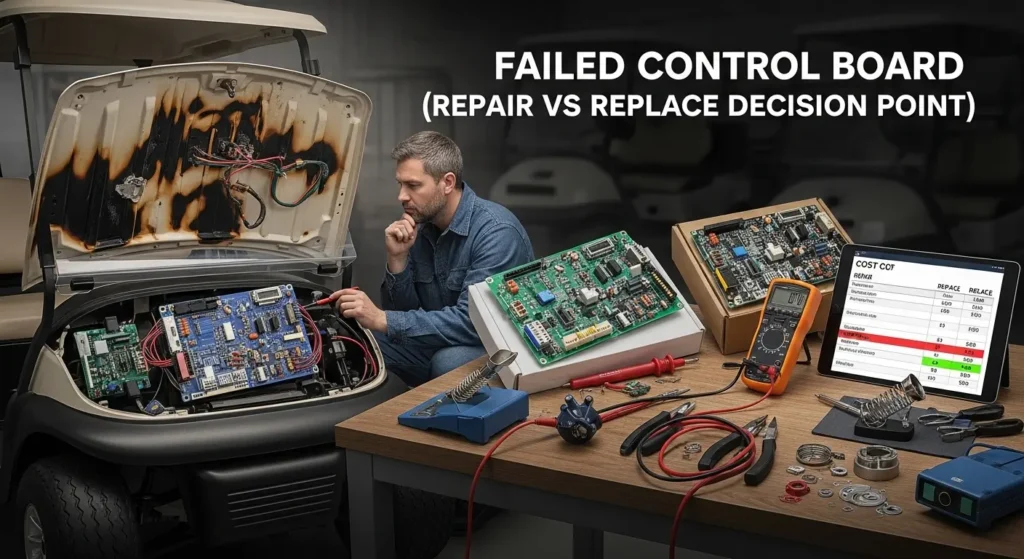
The charger’s main control board — the PCB that manages the charging algorithm, communicates with the OBC, and regulates output voltage and current — is the most expensive internal component to replace. Replacement control boards for OEM chargers cost $80-$200 depending on the model. Professional repair shops that service electronics can sometimes repair failed boards for $60-$120.
The repair-vs-replace decision at this point: if the charger is 7 years or older, spending $120-$200 on a control board repair for an aging charger with other potential failures developing is often not the right economic choice. A new Lester Summit II or Delta-Q IC650 at $300-$450 provides a current-generation charger with a fresh warranty, better algorithms, and selectable chemistry profiles that an older OEM charger cannot match. The age and remaining service value of the charger is the primary factor.
| Failure Component | Repair Cost | DIY Feasible? | New Charger Cost | Recommendation |
| Internal AC/DC fuse | $2 – $8 | Yes | N/A | Always repair. Cheapest fix available. Identify root cause of blown fuse before replacing. |
| Cooling fan | $15 – $40 | Yes | N/A | Always repair if charger is under 6 years old. Simple 30-minute job that restores full function. |
| Output connector / plug | $15 – $45 | Yes | N/A | Repair first. Connector replacement is high value. Only replace full charger if connector damage indicates broader electrical fault. |
| Control board (charger under 5 yrs) | $80 – $200 | Intermediate | $300 – $450 | Repair is cost-effective if charger is under 5 years old. Get a quote from electronics repair shop before committing. |
| Control board (charger 7+ yrs) | $80 – $200 | Intermediate | $300 – $450 | Replace the charger. A new Lester Summit II provides better algorithms, full warranty, and multi-chemistry capability. Board repair cost is not economical vs replacement. |
| OBC module (EZGO / Club Car) | $150 – $250 | Yes (bolt-in) | $300 – $450 | Repair (replace OBC module) if OBC fault code is confirmed. OBC module replacement is a clean bolt-in repair — no reason to replace the entire charger for an OBC fault. |
When to Stop Repairing and Buy a New Charger
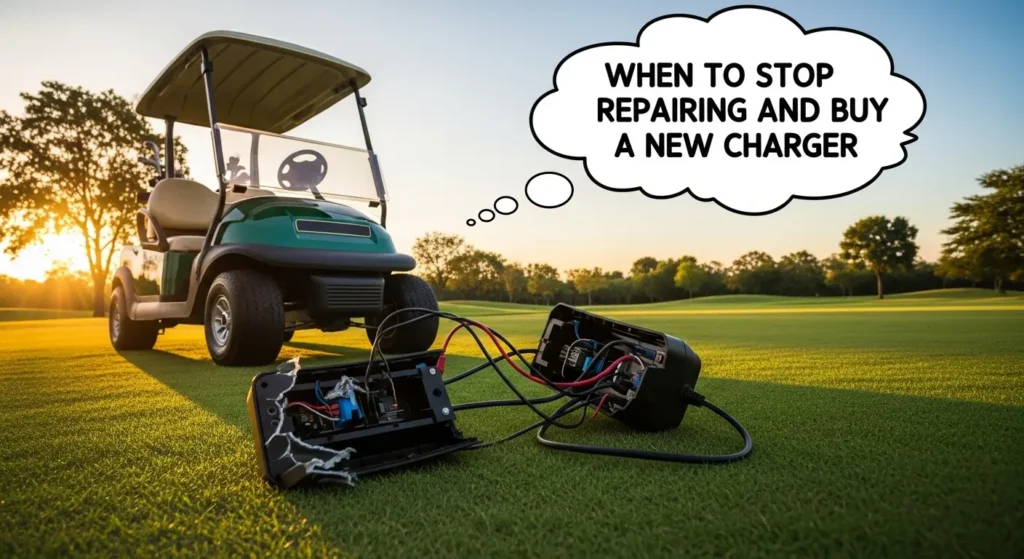
Charger replacement is justified when one or more of the following is true. Work through this decision checklist before committing to a repair on an older charger:
- The charger is 8 or more years old and has had a component failure — at this age, additional components are likely nearing end of life regardless of what the current fault is.
- The control board has failed and the charger is over 5 years old — repair cost relative to replacement value does not support board replacement.
- You are switching battery chemistry (from lead-acid to lithium) — this requires a charger with a selectable LiFePO4 profile that most OEM chargers do not have.
- The charger is an early-generation OBC type that does not support modern battery monitoring protocols — upgrading to a Lester Summit II or Delta-Q with the correct OBC algorithm provides better charging intelligence as well as fault tolerance.
- You have replaced batteries twice in five years and the charger was never changed — it is very likely the charger contributed to both premature battery failures and should be part of the replacement decision regardless of its apparent function.
| REPLACEMENT RECOMMENDATION | If your charger is being replaced, the Lester Summit II is our most recommended aftermarket replacement for all platforms. It supports flooded, AGM, and LiFePO4 chemistry with DIP switch selection, outputs up to 25 amps for faster charge times, has a built-in fault code display, and carries a 2-year warranty. The Delta-Q IC650 with Club Car or EZGO algorithm installed is an excellent alternative with a strong track record in commercial fleet applications. Both are available at Golf Cart Gears. |
Frequently Asked Questions
My golf cart charger runs but the batteries never seem to reach full charge. What is wrong?
This is either a charger absorption voltage problem or a sulfated battery pack — or both. First, measure your charger’s output voltage during the absorption stage (after approximately 2-3 hours of charging on a depleted pack). It should reach 58.4-59.5V on a 48V system. If voltage is correct but charge takes unusually long, the batteries have reduced charge acceptance from sulfation. If voltage is below 58V during absorption, the charger’s voltage regulation circuit has drifted and is chronically undercharging your pack.
Why does my EZGO charger click on and off repeatedly instead of charging normally?
Repeated clicking without sustained charging is most commonly caused by battery pack voltage that is too low to satisfy the charger’s initiation check. The charger starts, reads pack voltage, finds it below threshold, and shuts off — then repeats. This happens after deep discharge from extended storage or a failed battery in the pack dragging down total voltage. Measure each battery individually to identify the low one, then perform a manual recovery charge on the weak battery before reconnecting the standard charger.
How do I know if my golf cart charger is bad or if the batteries are bad?
The definitive test: measure charger output voltage directly at the charger connector terminals during an active charge cycle. If output voltage is below 58V on a 48V system after 30-60 minutes of charging, the charger is underperforming regardless of battery condition. If charger voltage is correct but the pack takes abnormally long to reach full charge or never quite gets there, battery sulfation is the primary problem. Both problems frequently coexist — a marginal charger caused the battery degradation in the first place.
Can I use any 48V charger on my golf cart, or does it need to match the brand?
It depends on whether your cart has an OBC system. Pre-2007 EZGO carts and pre-2000 Club Car DS models do not have OBC and accept any compatible 48V automatic charger. Post-2007 EZGO carts and all Club Car Precedent models have OBC communication requirements — the charger must send the correct handshake signal to initiate charging. The Lester Summit II with the correct profile selected is universally compatible across all OBC and non-OBC platforms and is our recommended solution for any cross-brand replacement.
What is the best replacement charger for an EZGO TXT?
For EZGO TXT models 2001-2006 (no OBC): Delta-Q IC650 or Lester Summit II set to 48V FLA profile. For EZGO TXT and RXV models 2007 onwards (OBC equipped): Lester Summit II with EZGO OBC algorithm, or EZGO Powerwise QE replacement. The Lester Summit II is the most versatile option because its algorithm can be set for any EZGO generation and also supports lithium chemistry if you convert later.
My Club Car Precedent shows a 2-1 error code. What does that mean?
Code 2-1 on a Club Car Precedent indicates a charge port connection fault — the OBC is not detecting a proper charger connection. Start by cleaning the charge port pins on both the cart and the charger connector with electrical contact cleaner and a soft brush. Apply dielectric grease after cleaning. This resolves the vast majority of 2-1 fault codes. If the fault persists after thorough cleaning, inspect for bent or broken pins and replace the charge port receptacle if necessary.
How long should a golf cart charger last?
A quality golf cart charger in typical residential use should last 7-12 years. Commercial fleet chargers that cycle daily typically last 5-8 years before performance degradation warrants replacement. The most common failure modes — fan failure and connector corrosion — are repairable and do not necessarily indicate end of charger life. A charger with accurate output voltage, a functional cooling system, and clean connectors can continue providing excellent service well past 10 years.
The Bottom Line: Diagnose Before You Replace
The golf cart charger is one of the most misdiagnosed components in the entire electrical system — not because it is complicated, but because the failure modes it produces often look like battery problems. A charger that is silently undercharging destroys batteries over 12-18 months in a way that is indistinguishable from normal battery aging until you think to measure the charger’s absorption voltage.
The discipline of reading error codes before touching anything, measuring charger output voltage before concluding the batteries are bad, and inspecting the charge port before condemning the charger — these habits save real money. In our experience, roughly 40% of the golf cart charging problems we hear about are resolved by charger diagnosis and a simple fix, not by battery replacement.
Work through the diagnosis sequence in this guide from cheapest to most expensive: AC input voltage, charge port inspection and cleaning, error code reading, output voltage measurement, and only then battery load test and component replacement. The answer is usually found before you reach the expensive end of that list.