When Your Golf Cart Refuses to Move: Start Here
You step in, turn the key, press the accelerator — and nothing happens. Or maybe it clicks once. Or it moves for two feet and dies. Or it moves fine in reverse but not forward. Every one of these symptoms tells a different story, and experienced technicians read those stories before they touch a single component.
The biggest mistake most owners make when their golf cart stops moving is jumping straight to the most expensive possible explanation. They assume the motor is dead, or the controller has failed, or the battery pack needs replacing. Sometimes those things are true. But in our experience helping thousands of golf cart owners troubleshoot this exact problem, the most common causes of a non-moving golf cart are embarrassingly simple: a corroded cable connection, a stuck micro-switch, a dead solenoid, or a battery that has discharged past the protection threshold.
This guide walks you through the complete diagnostic sequence that professional golf cart technicians use — starting with the free five-minute checks that catch roughly 40% of all “golf cart not moving” problems, moving through the intermediate electrical diagnostics, and ending with the component-level failures that do require professional help or parts replacement.
We cover both electric and gas golf carts, with specific sections for Club Car Precedent, EZGO RXV and TXT, and Yamaha Drive2 — the three platforms that represent the majority of carts in the field today.
Table of Contents
| QUICK DIAGNOSISGolf cart not moving? Check these five things first:1. Battery charge: Check all battery voltages individually with a voltmeter. A single dead cell in one battery kills the whole pack.2. Solenoid click: Turn key on, press accelerator. Do you hear a click from under the seat? No click = solenoid, controller, or safety switch issue.3. F/R switch and run/tow switch: Both must be in the correct position. The tow/maintenance switch bypasses the drive system entirely.4. Micro-switches: The accelerator pedal micro-switch is the single most common cause of electric carts that click but do not move.5. Cable connections: One loose or corroded cable connection in the battery string can take down the entire pack voltage. Check every terminal. |
Before You Diagnose: Safety Steps That Are Not Optional
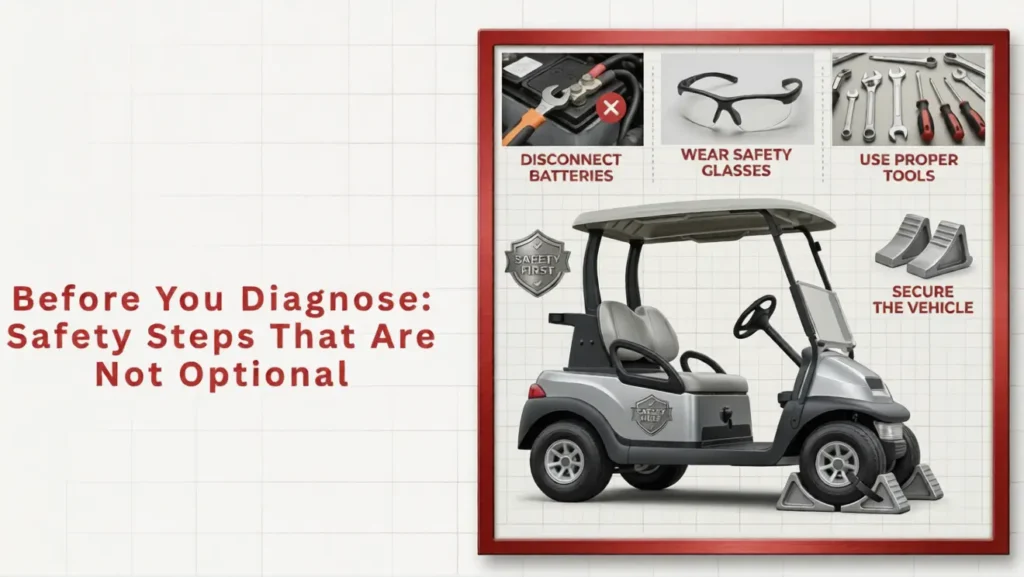
Working on golf cart electrical systems carries genuine risk. The battery pack voltage on a 48-volt system can deliver enough current to cause severe burns or serious injury if cables are shorted across terminals. Before any hands-on diagnostic work, follow this safety sequence every time:
- Park on a flat surface and engage the parking brake fully.
- Remove the key from the ignition.
- Set the Forward/Reverse switch to the neutral position if accessible.
- Put on safety glasses. Battery acid splatter from a damaged or overcharged cell causes permanent eye injury.
- If you need to disconnect cables, remove the negative cable from the main battery first. This breaks the circuit.
- Never place metal tools across two battery terminals simultaneously. Even momentarily bridging terminals with a spanner can cause an arc and severe burns.
- Keep a dry chemical fire extinguisher accessible when working around batteries.
| SAFETY FIRST | A 48-volt golf cart battery pack can deliver over 500 amps of short-circuit current. That is enough to instantly weld a ring to your finger or cause a battery explosion if a cell is cracked. Treat this system with the same respect you would give any high-current electrical system. The diagnostic steps in this guide are designed to be done safely — do not shortcut the safety prep. |
Symptom-First Diagnosis: What Your Cart Is Trying to Tell You
Different symptoms point to different root causes. Use this table to identify your most likely culprit before working through the full diagnostic sequence.
| Symptom | Most Likely Cause(s) | Where to Look in This Guide |
| Completely dead — no click, no lights, nothing | Dead batteries, blown main fuse, battery disconnect switch | Section 3: Battery Checks, Section 4: Fuses and Safety Switches |
| Clicks once but does not move | Solenoid engaging but not staying; controller fault; bad batteries under load | Section 5: Solenoid Diagnostics |
| Click and buzz but no movement | Solenoid stuck, motor fault, or low voltage under load | Section 5: Solenoid, Section 7: Motor Checks |
| No click at all when accelerating | Micro-switch on accelerator pedal, F/R switch, run/tow switch | Section 4: Safety Switches, Section 6: Micro-Switches |
| Moves slowly then stops; weak power | Battery pack low or failing under load, corroded cable, poor connection | Section 3: Battery Load Test, Section 4: Cable Inspection |
| Works in reverse but not forward (or vice versa) | F/R switch fault, controller directional fault | Section 4: F/R Switch, Section 8: Controller |
| Moves a few feet, then shuts off | BMS protection trip (lithium), over-temperature cutoff, controller fault | Section 3: BMS Reset, Section 8: Controller Diagnostics |
| Gas cart: engine cranks but will not start | Fuel issue, spark plug, choke, carburetor blockage | Section 9: Gas Cart Specific Diagnostics |
| Gas cart: starts but bogs down under load | Carburetor jets, fuel filter, governor setting | Section 9: Gas Cart Specific Diagnostics |
| Loud clunk when accelerating | Drive coupler, motor coupler, rear axle key | Section 10: Drivetrain Checks |
Section 3: Battery Diagnostics — The First Place to Look
Batteries are responsible for more golf cart “not moving” situations than every other component combined. Before any other diagnostic step, the battery system needs to be verified — not just glanced at, but properly measured.
Step 1: Check Individual Battery Voltages
Get a basic voltmeter or multimeter — you can buy one for under $20 at any hardware store and it will be the most useful tool you own for golf cart maintenance. Set it to DC voltage and measure each battery individually.
For a properly charged pack, individual battery voltages should read:
- 6-volt battery: 6.3 – 6.4 volts fully charged
- 8-volt battery: 8.4 – 8.5 volts fully charged
- 12-volt battery: 12.6 – 12.8 volts fully charged
If one or more batteries reads significantly lower than the others — say, 4.8V in a 6V battery when others read 6.3V — you have found your problem battery. A single weak battery in a series-wired string drags down the entire pack voltage and can cause the cart to refuse to move, move weakly, or cut off under load.
If all batteries read low (e.g., all 6V batteries reading 5.8V or less), the whole pack is discharged. Charge fully and retest before diagnosing further.
| TECH TIP | Voltage measured at rest (static voltage) tells you the surface charge, not the actual health of the battery. A battery that reads 6.3V at rest can collapse to 4.5V the moment it is placed under load. Always perform a load test after checking static voltage if you want to know the true condition of the pack. |
Step 2: Perform a Load Test (The Real Battery Health Check)
A load test measures battery performance under actual operating current draw — the only way to reveal a battery that looks healthy at rest but fails under load. This is how professional technicians distinguish between a battery that is merely discharged and one that is genuinely failing.
The simplest field load test for a golf cart battery: fully charge the pack, then drive the cart up a moderate incline or maintain full throttle for 30-60 seconds. Measure each battery voltage immediately after stopping while the pack is still hot from load. Healthy batteries should maintain within 0.5V of their rested voltage. A battery that dropped 2 or more volts under load while others stayed stable is failing internally and should be replaced.
A professional carbon pile load tester provides a more precise measurement and is the tool most golf cart shops use for battery diagnosis. If you do not own one, any golf cart dealer or battery shop will run a load test for little or no cost.
Step 3: Check the Battery Connections
This step costs nothing and catches an astonishing number of problems. Grab each battery cable at the terminal connection and try to wiggle it firmly. A cable that moves even slightly is creating resistance at that connection — resistance that can drop pack voltage by a full volt under load, which translates directly into a cart that feels like it has dead batteries.
Look for white or blue-green powder around the terminal posts — that is lead sulfate or copper sulfate corrosion, and it is an insulator. Even a thin layer can create enough resistance to cause intermittent power loss or no-movement symptoms.
Clean corroded terminals with a tablespoon of baking soda dissolved in warm water. Scrub with an old toothbrush, rinse, dry, then apply a thin coat of anti-corrosion spray or white petroleum jelly to the terminal and cable lug before reassembling. Tighten all connections to manufacturer specification — typically 90-110 inch-pounds for most battery terminal bolts. Do not overtighten and crack the battery case, but do not leave them finger-tight.
Step 4: Lithium Battery BMS Reset
If your cart has a lithium iron phosphate battery pack, there is one additional step before moving to other diagnostics. LiFePO4 packs have a Battery Management System (BMS) that will disconnect the output entirely if the pack has been over-discharged, over-heated, or if a cell has gone out of safe voltage range. To the user, this looks exactly like dead batteries — the cart simply will not respond.
Most BMS systems reset automatically once the pack is charged to a safe level. Connect the charger, allow it to run for a full cycle (the charger will click off at completion), then try the cart again. If the charger itself will not initiate — it connects but shows an error or runs for only a few seconds — the BMS may be in a protection state that requires a manual reset.
Dakota Lithium and Eco Battery packs both have reset procedures that involve briefly connecting to the charger and sometimes a specific button sequence on the BMS module. Refer to your specific battery’s manual or contact the manufacturer’s support line — this is not a generic procedure and varies meaningfully between brands.
Section 4: Fuses, Safety Switches, and Interlock Systems
Modern golf carts are designed with multiple safety interlocks that prevent the cart from moving under unsafe conditions. These interlocks can also prevent the cart from moving when there is a fault — and they are a frequent source of no-movement problems that get misdiagnosed as battery or motor failures.
The Main Fuse
Every electric golf cart has at least one main fuse protecting the electrical system. On Club Car models, this is typically a 300-amp blade-type fuse located near the battery pack. On EZGO models, there is usually a reset-type circuit breaker (a round black button) near the motor or controller. On older Yamaha models, look for a fuse block under the seat near the main wiring harness.
A blown main fuse produces exactly the same symptom as dead batteries: the cart is completely dead with no response at all. The difference is that a blown fuse typically occurs suddenly — the cart was working fine, then stopped — rather than degrading gradually the way battery failure does.
To check: locate the main fuse, remove it, and test it with a continuity tester or multimeter on the resistance setting. Infinite resistance = blown fuse. Replace with an exact-rated replacement — never upsize a fuse, as the fuse rating is specifically chosen to protect the wiring downstream.
The Run/Tow Switch (Also Called the Maintenance Switch)
This is the single most embarrassing and most common source of “my golf cart won’t move” calls that we receive on our support line. The run/tow switch, found under the seat on most Club Car, EZGO, and Yamaha models, must be in the RUN position for the cart to operate. In the TOW position, it completely disconnects the drive system — by design, so carts can be towed without engaging the motor as a brake.
If you have had any work done on the cart, if the cart has been stored, or if someone has been working under the seat for any reason, check this switch first. It takes five seconds. Many carts get pushed to a shop on a trailer because nobody checked whether the run/tow switch was in the tow position.
The Forward/Reverse Switch
The F/R switch on older carts is a mechanical direction selector that routes power to the motor in the correct polarity for forward or reverse movement. It is physically demanding on the contacts during direction changes — particularly when operators switch from forward to reverse while still moving — and contact wear or arcing can cause intermittent or complete failure.
A failing F/R switch typically presents as: the cart works in one direction but not the other, or works intermittently and requires wiggling the switch lever to engage. Test by gently toggling the switch back and forth while the key is on and the accelerator is depressed. If the cart responds to switch movement, the switch contacts are worn and the switch needs replacement.
Most F/R switches cost $25-$80 and are a 20-30 minute DIY replacement on most platforms. This is one of the most cost-effective repairs in golf cart maintenance.
The Seat Switch and Other Safety Interlocks
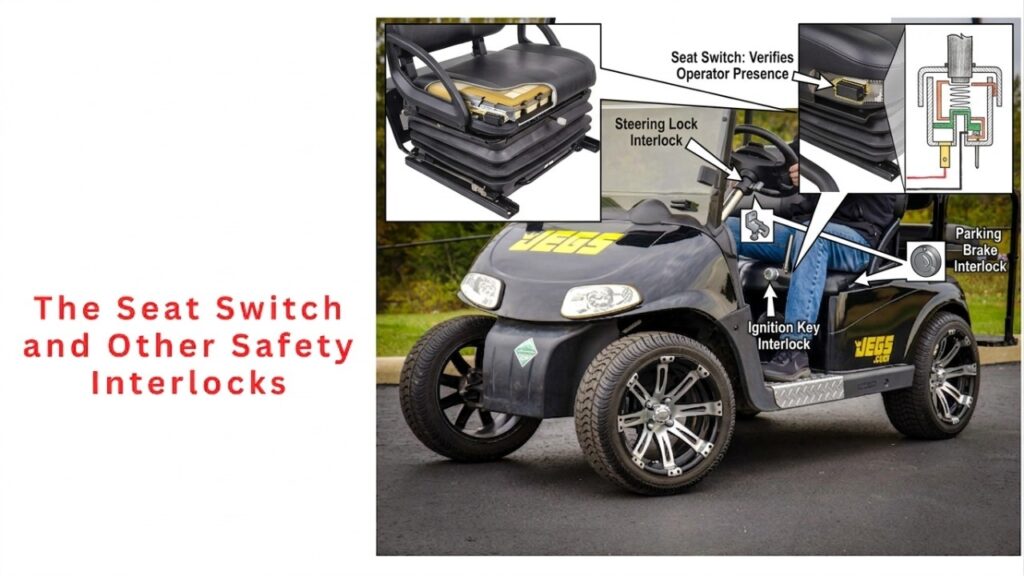
Some golf cart models — particularly EZGO RXV and some Club Car models — include a seat switch that prevents the cart from moving unless weight is detected on the seat. If this switch is faulty or misaligned, the cart will behave exactly as if the key is not in the ignition: no response at all.
To test: sit fully in the seat (not on the edge) and try operating the cart. If the cart works with full weight on the seat but not with the operator partially seated, the seat switch is the likely culprit. These switches typically cost $15-$30 and install in minutes.
Section 5: The Solenoid — Golf Cart’s Most Replaced Component
The solenoid is an electromagnetic switch that connects the battery pack to the motor controller when you press the accelerator. Think of it as a relay — a small electrical signal from the controller closes a high-current switch that allows the full battery pack current to flow to the motor system. When it works, you hear a satisfying click every time you press the accelerator pedal. When it fails, you get one of several distinctive symptoms.
Diagnosing a Failing Solenoid
| Symptom | What It Means | Test / Fix |
| No click at all when accelerating | Solenoid is not receiving the activation signal. Could be micro-switch, controller output, or open coil winding. | Test coil terminals with voltmeter. Should see battery voltage when accelerator is depressed. No voltage = upstream issue. |
| One click, cart does not move | Solenoid activates but main contacts are not closing fully. Contacts may be pitted or the solenoid is weak. | Test main terminals after click — if voltage present on both sides when clicked, contacts are closing. If voltage does not pass, solenoid contacts are failed. |
| Rapid clicking (chatter) | Battery voltage too low to hold solenoid closed. Solenoid activates momentarily then battery droops below threshold. | Charge batteries fully and retest. If chattering persists after full charge, battery pack has a failing cell causing voltage collapse under load. |
| Click but solenoid stays engaged (stuck closed) | Contacts have welded together. Cart may move uncontrolled until key is removed. This is a safety risk. | Immediately remove key and do not operate the cart. Replace solenoid — a stuck-closed solenoid can cause unexpected movement and brake failure. |
Replacing a Golf Cart Solenoid: DIY or Shop?
Solenoid replacement is an intermediate-level DIY job. The solenoid is typically mounted near the motor or controller under the seat. The job involves: disconnecting the battery pack, labelling every wire connected to the solenoid (photograph everything before disconnecting), removing the old solenoid, installing the new one, reconnecting in the same configuration, and testing.
Solenoids for Club Car, EZGO, and Yamaha are well-stocked at GolfCartGears.com, typically priced $35-$85 depending on amperage rating and platform. Make sure you match the voltage rating (36V or 48V) and the terminal configuration. A 36V solenoid installed on a 48V system will fail quickly or immediately.
The job takes an experienced DIYer 30-45 minutes. A shop charges $90-$150 for the same job including the part. If you are comfortable labelling wires, working in tight spaces, and following a clear reassembly sequence, this is genuinely within DIY capability.
| TECH TIP | Always photograph every wire and terminal on the old solenoid from multiple angles before removing a single connection. Solenoids have small-gauge coil wires and large-gauge main power cables, and getting them crossed on the new solenoid will cause immediate failure or damage to the controller. The five minutes you spend photographing saves forty minutes of confusion during reassembly. |
Section 6: Accelerator Micro-Switches — The Hidden Culprit
The accelerator pedal micro-switch is a tiny switch that tells the cart’s controller when the pedal is depressed. Without a signal from this switch, the controller does not know the pedal is being pressed, and the solenoid never activates. The cart is completely silent and unresponsive.
This switch is exposed to water, dirt, physical stress from pedal movement, and decades of repetitive actuation. It fails more often than almost any other component in the cart’s electrical system, and it costs $8-$25 to replace. The mismatch between how often it causes problems and how cheap it is to fix makes it one of the best-value diagnostic items to check early.
Testing the Accelerator Micro-Switch
Locate the micro-switch on the accelerator pedal assembly — it is a small rectangular switch with either a button or roller actuator that gets pressed when the pedal is depressed. With the key off, manually depress the switch button with your finger and listen for a distinct click. No click from a switch that visually shows no obvious damage may indicate a failed switch.
For a definitive test: set your multimeter to continuity or resistance. With the switch in its normal unpressed state, you should have either open or closed circuit depending on whether the switch is normally-open (NO) or normally-closed (NC). When the button is pressed, the circuit should change state. If pressing the button produces no change in continuity reading, the switch has failed internally.
Replacement micro-switches are available for virtually every Club Car, EZGO, and Yamaha model. Make sure to match the mounting hole pattern and actuator type. This is a 15-minute repair on most platforms — remove the old switch, note the wiring connections, transfer the wires to the new switch in the same positions, reinstall. If this fix alone gets your cart moving, you have just saved yourself a potential diagnosis spiral that could have pointed at every other component first.
Section 7: Motor Diagnostics — When to Suspect the Motor
Motor failure is genuinely less common than most people assume, but it does happen — particularly in older carts, carts that have been run in flooded conditions, or carts where the motor has been overloaded repeatedly. The motor is typically the last thing to diagnose because it requires more invasive testing and the repair or replacement cost is higher than upstream components.
Symptoms of a Failing or Failed Motor
- Cart clicks (solenoid activating) but produces no shaft rotation and no heat from motor body
- Motor gets extremely hot rapidly under minimal load — indicates a shorted winding
- Motor runs but produces substantially less torque than normal — weak field magnets or worn brushes (DC motors)
- Motor makes grinding or scraping noise — worn or seized bearings
- Burning smell from under the seat during or after operation
DC Motor Check (Older Carts — Club Car DS, EZGO TXT, Older Yamaha)
Older electric golf carts use DC series-wound motors with carbon brushes. These brushes wear down over time and need periodic replacement — typically every 3-6 years on a regularly used cart. Worn brushes cause reduced torque, intermittent operation, and eventually no movement at all.
To inspect brushes: remove the motor from the cart (or access the brush caps if accessible without full removal), and inspect brush length. New brushes are typically 3/4 to 1 inch long. Brushes worn down to 1/4 inch or less need immediate replacement. This is a legitimate DIY repair on DC motors — brush replacement kits are available for all major platforms and cost $15-$45.
While the brushes are accessible, inspect the commutator — the copper drum the brushes ride on. Light copper-coloured oxidation is normal. Deep grooves, carbon tracking, or severe pitting indicate the commutator needs resurfacing by a motor rebuilder.
AC Motor Note (EZGO RXV, Newer Club Car)
Newer AC induction motors are brushless and significantly more durable than DC motors. They virtually never fail in normal cart use before the rest of the cart wears out. If you have an EZGO RXV, Club Car Onward, or Yamaha Drive2 with an AC motor and suspect motor failure, have the controller and harness fully diagnosed first — AC motor failure on these platforms is rare, and the cause is almost always upstream in the controller or BMS system.
Section 8: Motor Controller — Advanced Diagnostics
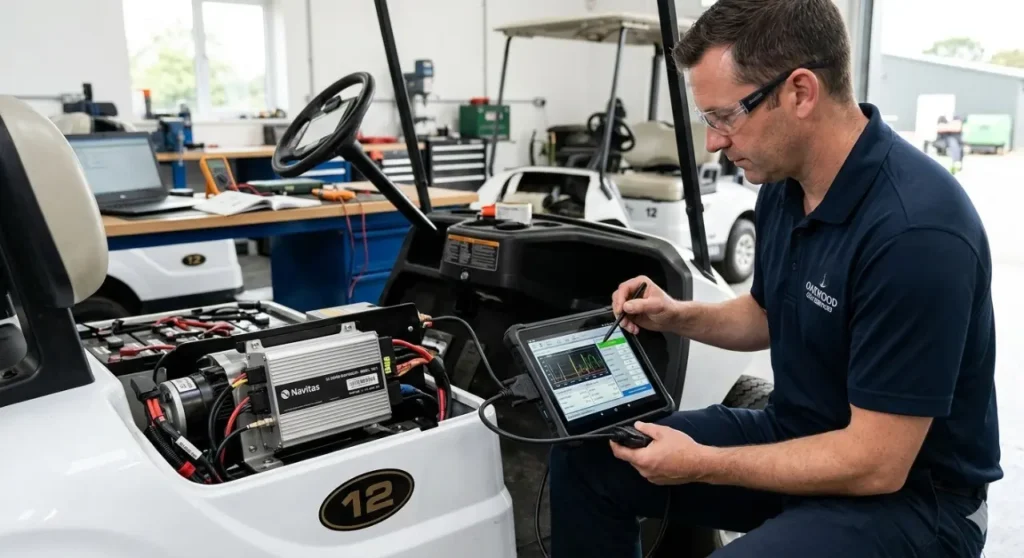
The motor controller is the brain of an electric golf cart. It takes the signal from the accelerator pedal, the direction switch, and the battery system, and modulates power delivery to the motor. Controller failures produce distinctive symptoms, and the good news is that most modern controllers include onboard diagnostic codes that significantly narrow down the problem.
Reading Error Codes by Platform
EZGO RXV and TXT (2010 onwards): These carts communicate fault codes through a series of LED flashes on the charger port or a diagnostic port under the seat. The number of flashes corresponds to a specific fault code. Common codes include: 1 flash (low battery), 3 flashes (overcurrent fault), 5 flashes (motor temperature), 7 flashes (controller internal fault). Refer to your specific model’s service manual for the complete code table.
Club Car Precedent: The Precedent’s PowerDrive Plus onboard computer stores fault codes accessible through the OBC diagnostic mode. With the key off, short the two small terminals on the OBC diagnostic port, then turn the key on. The OBC LED will flash a code sequence. Code 1-1 is low battery. Code 3-1 is a solenoid fault. Code 7-1 is a controller fault. Full code documentation is available in the Club Car service manual.
Yamaha Drive2: Yamaha uses a diagnostic port under the passenger side footwell on Drive2 models. The diagnostic tool (or an OBDII adapter with the right software) reads fault codes from the Yamaha EC controller. Common codes include motor overcurrent, battery voltage faults, and throttle position sensor errors.
| COST REALITY | Motor controller replacement is one of the more expensive repairs on an electric golf cart. A replacement Alltrax, Navitas, or OEM controller for a 48V system runs $250-$600 depending on amperage rating and platform. Before authorising a controller replacement, have the solenoid, micro-switches, and all wiring connectors fully verified — controllers are frequently replaced unnecessarily when the actual fault is a $15 micro-switch or a corroded connector. |
Section 9: Gas Golf Cart Diagnostics
Gas golf carts — most commonly Yamaha G-series and Drive2 gas, Club Car DS gas, and EZGO TXT gas — have their own set of failure modes when they refuse to move. Unlike electric carts where the drive system is purely electrical, gas carts combine an internal combustion engine with a centrifugal clutch and belt drive system. Problems can occur in the engine, the fuel system, the ignition system, or the mechanical drivetrain.
Engine Cranks But Will Not Start
If the starter motor engages (you hear cranking) but the engine will not fire and run, work through this sequence:
- The gauge on golf cart gas tanks is frequently inaccurate. Remove the fuel cap and look inside or shake the cart to listen for fuel movement.Check fuel level:
- Remove one spark plug, reconnect the spark plug wire, lay the plug against the engine block (for grounding), and crank the engine. You should see a blue-white spark. No spark or a weak orange spark indicates ignition system fault — check the ignition coil, kill switch, and CDI module.Check for spark:
- Remove and inspect. A black, sooty plug indicates running rich (too much fuel). A white, blistered plug indicates running lean (too little fuel or overheating). Replace if electrode is worn or gap is incorrect (typically 0.030-0.035 inch on most golf cart engines).Check the spark plug itself:
- Cold starting requires the choke to be partially or fully closed. On manual choke systems, confirm it is in the correct starting position. On automatic choke systems, a stuck choke can prevent cold starting.Check the choke:
- The most common gas cart starting failure after a period of storage is a varnished or clogged carburetor. Fuel degrades significantly in as little as 30 days without a fuel stabiliser, leaving gummy deposits that block the small jets. Spray carburetor cleaner through the jets and air passages with the bowl removed. If the engine starts briefly on a shot of starting fluid sprayed into the air intake but dies immediately, a blocked carburetor is confirmed.Check the carburetor:
Engine Runs but Cart Will Not Move
If the engine runs but the cart does not move, the problem is mechanical — between the engine output and the rear wheels. Golf cart gas carts use a centrifugal clutch (driven by engine RPM) and a variable-ratio belt drive to transmit power to the rear axle.
- Broken or worn drive belt: The most common mechanical cause. A slipping or broken belt gives zero or very reduced drive even at full throttle. Inspect the belt through the clutch cover opening — look for fraying, cracking, or visible breakage.
- Worn centrifugal clutch (drive clutch): The drive clutch engages at a specific RPM. Worn flyweights, broken clutch springs, or a stuck sheave prevents proper engagement. Symptom: engine revs freely but little or no power transfers to the belt.
- Stuck or seized driven clutch: The driven clutch on the transaxle side expands as belt speed increases. A seized driven clutch won’t allow the belt to sit correctly. Spray the sheave faces with clutch lubricant and cycle manually to check for free movement.
- Shear pin or axle key: Some models have a shear pin or drive key in the rear axle that can fail, allowing the wheel hub to spin on the axle shaft. If the axle rotates but the wheel does not, this is the likely cause.
Section 10: Platform-Specific Notes for Club Car, EZGO, and Yamaha
Club Car Precedent — OBC Issues
The Club Car Precedent’s On-Board Computer charging system is a frequent source of “ghost” faults that look like electrical failures but are actually OBC communication errors. If the Precedent runs fine on a partially discharged pack but refuses to move after a full charge, suspect the OBC. The OBC can develop a fault that puts the cart in a permanent charge-inhibit state.
The quick field test: bypass the OBC by connecting the charger directly to the battery pack (bypassing the OBC plug). If the cart runs normally after bypassing, the OBC is the fault. OBC replacement or reprogramming is the remedy — Golf Cart Gears stocks replacement OBC units for Precedent models.
EZGO RXV — BMS Light and Code Reading
The EZGO RXV is one of the best-documented platforms for DIY diagnosis because Textron published reasonably detailed fault code documentation. The charger port LED on the RXV flashes diagnostic codes even when the cart is not connected to a charger — simply turn the key on without pressing the accelerator and watch the LED. Count the flashes in sequences. This tells you exactly where the RXV’s own diagnostic system is pointing before you touch anything.
The most common RXV no-movement fault is Code 1 (low battery voltage). The second most common is a stuck accelerator micro-switch preventing the throttle signal from reaching the controller. Both are simple, low-cost fixes that account for the majority of RXV no-movement calls we handle.
Yamaha Drive2 — Speed Sensor and Throttle Position
Yamaha Drive2 electric models use a throttle position sensor rather than a mechanical micro-switch to detect pedal position. These sensors can develop intermittent faults — typically caused by corrosion in the connector rather than sensor failure itself — that the Yamaha EC controller interprets as a safety fault and shuts down drive.
The fix is often as simple as unplugging the throttle position sensor connector, spraying both connectors with electrical contact cleaner, and reconnecting firmly. If the fault persists, the connector pins may need cleaning with a pin cleaning tool or the sensor itself may need replacement (approximately $45-$80 for an OEM or quality aftermarket sensor).
Section 11: When to Stop Dying and Call a Professional
There is no shame in knowing where DIY ends and professional service begins. The cost savings of self-diagnosing and fixing simple components are real — but incorrectly diagnosing a controller fault, misrouting high-current cables, or incorrectly reassembling a motor can cause additional damage that makes the eventual repair bill significantly larger.
Hand the cart to a professional when:
- You have worked through the full diagnostic sequence and cannot identify the fault — a good golf cart technician with the right tools can diagnose in 45-90 minutes what takes an owner a full day of trial and error
- The fault codes point to a controller or OBC issue — these require specific programming tools that most independent shops have and most homeowners do not
- You smell burning from the motor or controller — continued operation can cause thermal damage to other components and create a fire risk
- The cart moves unexpectedly or the solenoid is stuck closed — this is a safety emergency, not a DIY diagnostic opportunity
- The motor needs brush replacement or commutator resurfacing — while technically DIY-capable, this requires physical access to motor internals that varies significantly by platform and is easier to mishandle than the other repairs described in this guide
Frequently Asked Questions
My golf cart clicks but does not move. What is it?
A single click followed by no movement most commonly indicates one of three things: the solenoid is engaging but the main contacts are not closing properly (failing solenoid), the battery pack has insufficient voltage to sustain the solenoid engagement under load (failing battery), or the motor has an open circuit fault. Test battery pack voltage under load first, then test solenoid main contacts as described in Section 5.
My EZGO will not move after sitting all winter. Where do I start?
After winter storage, always start with a full battery charge — batteries self-discharge during storage and a deeply discharged lead-acid pack can develop a BMS protection state or sulfation that prevents normal operation. After a full charge, check the run/tow switch position under the seat. Then check the F/R switch for corrosion from humidity. Then check all battery connections for winter corrosion. In over 60% of post-storage no-movement situations, one of those three items is the cause.
How much does it cost to fix a golf cart that will not move?
It depends entirely on the root cause. A failed micro-switch: $10-$25 in parts, 15 minutes of time. A blown fuse: $5-$15. A failed solenoid: $35-$85 in parts plus 30-45 minutes. A failed F/R switch: $25-$80 in parts. A failed controller: $250-$600 in parts plus $80-$150 labour. A failed motor: $200-$600 in parts plus $150-$300 labour. A complete battery pack replacement: $1,000-$3,500 depending on chemistry. Working through the diagnostic sequence from cheapest to most expensive saves real money.
Can I test the solenoid without a multimeter?
You can do a basic functional test without a multimeter: with the key on and the run/tow switch in run position, press the accelerator slowly. If you hear a click from the solenoid, the solenoid is activating. If you hear a click but the cart does not move, test whether voltage is passing through the solenoid main contacts using a test light. No click at all means the solenoid is not receiving a signal — trace backward to the micro-switch, F/R switch, and controller output. A multimeter makes this faster and more precise, but is not absolutely required for basic functional tests.
Why does my golf cart move in reverse but not forward?
This specific symptom almost always points to the Forward/Reverse switch rather than the motor, battery, or controller. The F/R switch routes power to the motor windings in the correct polarity for direction. If the switch’s forward contacts are worn or corroded while the reverse contacts still work, you get exactly this symptom. Replace the F/R switch — it is typically a $25-$60 part and a 30-minute job.
My gas golf cart engine runs but the cart barely moves. What is wrong?
A running engine with very little drive power on a gas cart almost always points to the drive clutch system. The most common causes are a worn or slipping drive belt, worn centrifugal clutch flyweights that cannot generate enough centrifugal force to engage fully, or a stuck driven clutch that prevents proper belt ratio change. Inspect the belt visually through the clutch housing access hole first — belt wear is visible and is the cheapest fix.
Final Checklist: Work Through This Before Calling Anyone
If your Golf Cart not moving, here’s how to fix it. If you want to be sure you haven’t missed anything simple, run through this sequence in order. It takes 20–30 minutes and catches most no-movement problems.
- Check the run/tow switch — is it in RUN? (30 seconds, free)
- Check individual battery voltages with a voltmeter — any cell significantly lower than others? (5 minutes, $15 tool)
- Check all battery cable connections — wiggle test and corrosion inspection (5 minutes, free)
- Check the main fuse or circuit breaker — test for continuity (2 minutes, free)
- Test the accelerator micro-switch — does it click and change continuity when pressed? (5 minutes, $8-25 to replace)
- Test the F/R switch — does the cart respond in reverse if not forward? (2 minutes, free)
- Read error codes if available — key on, watch the charger port LED on EZGO RXV (2 minutes, free)
- Test solenoid — do you hear a click when accelerating? Test main terminals for voltage pass-through (5 minutes, free)
If you have worked through all eight steps and the cart still will not move, you are into motor, controller, or wiring harness territory that benefits from professional diagnostic equipment. At that point, you have already eliminated the eight most common causes — which is valuable information that helps the technician focus on what is actually left.