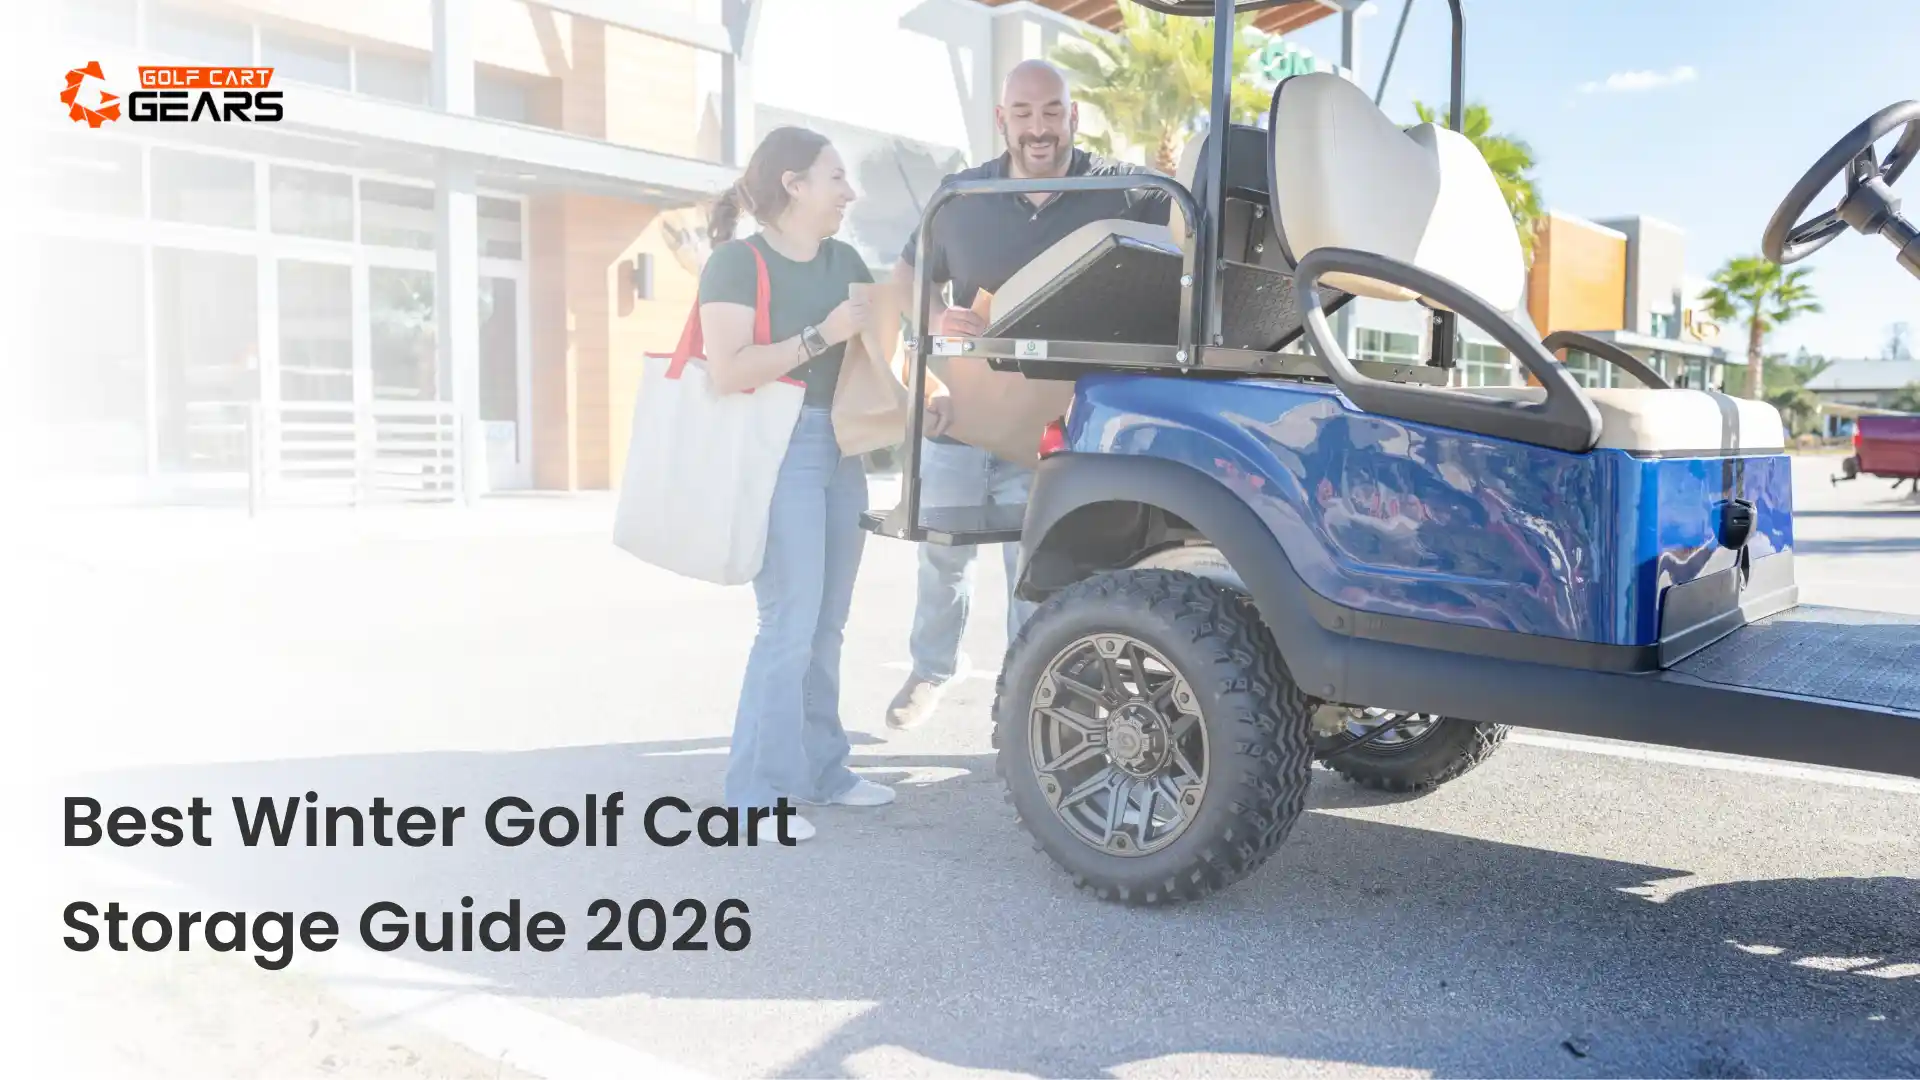
Every spring, Golf Cart Shops across the northern United States field a predictable wave of service calls. Carts that were parked in garages or sheds the previous November come back out in April with the same set of problems: dead or damaged battery packs, corroded terminals, chewed wiring from rodent nesting, cracked or stiffened gaskets, and, in some cases, seized brakes from rust buildup on the drum surfaces.
Almost all of these problems are preventable. They share a common root cause: the cart was simply parked and abandoned for the winter with no preparation. The owner thought of storage as ‘parking for longer’ when it is actually a distinct phase of ownership that requires its own specific protocol.
The chemistry and physics at work during storage are different from the chemistry and physics of active use. Batteries self-discharge. Sulfation progresses in discharged batteries even without cycling. Moisture condenses on metal surfaces when temperatures cycle through freezing. Rodents seek out confined, insulated spaces with nesting material. Rubber components dry out and lose elasticity. None of these processes requires the cart to be driven — they happen simply because the cart exists and time passes.
This (Winter Golf Cart Storage Guide) from Golf Cart Gears covers every aspect of best winter golf cart storage: the complete pre-storage preparation checklist, battery storage protocols for both lead-acid and lithium packs, the rodent and moisture prevention steps that most guides mention without sufficient specificity, gas cart–specific considerations, and a complete spring recommissioning procedure that returns the cart to service correctly rather than hopefully.
Table of Contents
Battery Storage: The Most Consequential Winter Decision
The battery pack is the most expensive component in an electric golf cart and the most sensitive to improper storage. Getting battery storage right is worth more than every other preparation step combined — an improperly stored battery pack costs $1,000-$1,600 to replace, while every other winter storage mistake costs a fraction of that to repair.
Flooded Lead-Acid Battery Storage Protocol
Lead-acid batteries self-discharge at a rate of approximately 5-15% per month at room temperature, and faster at warmer temperatures. A fully charged battery that sits for three months without any maintenance charging will be significantly discharged by spring, and a discharged lead-acid battery undergoes sulfation that progresses continuously throughout the discharge period.
The sulfation during storage is different in character from the sulfation that occurs during normal use because it progresses without the equalisation benefit of regular charging. Hard sulfate crystals form on the plates and continue to grow throughout the storage period. A battery stored discharged for four months may have more severe sulfation than a battery that was used daily for a full year.
The correct lead-acid storage protocol has three components:
| Step | Timing | Procedure |
| Full charge + equalization | Before storage | Perform a complete charge cycle including equalization. A fully charged, equalised pack has the highest possible electrolyte concentration (specific gravity ~1.265-1.280), which inhibits freezing at normal winter temperatures and minimises sulfation formation during storage. |
| Electrolyte level check and correction | After final charge, before storage | After the final pre-storage charge, check and correct all cell electrolyte levels with distilled water. The post-charge level is the correct baseline. Do not overfill — the electrolyte will not be depleted further during storage without active charging. |
| Maintenance charging during storage | Every 4-6 weeks | Connect the charger every 4-6 weeks for a maintenance top-up charge. Many quality chargers have a storage or maintenance mode that delivers a very low current trickle to counteract self-discharge without overcharging. If leaving for extended storage (4+ months), use a smart maintainer or trickle charger rated at C/100 or less. |
| Alternative: disconnect + monthly recharge | If no trickle charger | If a continuous trickle charger is not practical, disconnect all cables from the battery pack and perform a full recharge manually every 30 days. Disconnecting prevents parasitic loads from accessories from draining the pack between charges. |
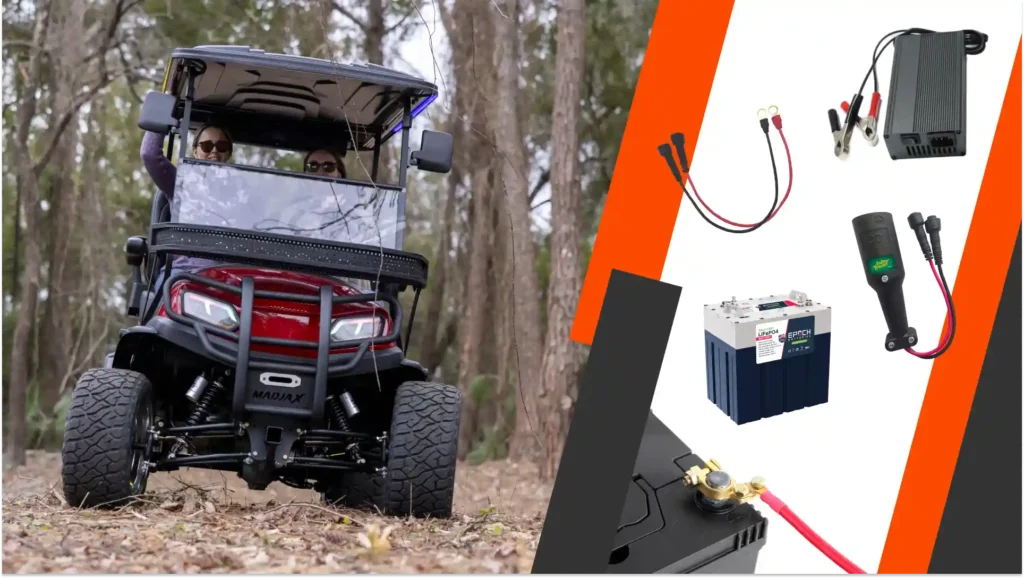
Lithium Battery Storage Protocol
Lithium iron phosphate batteries handle storage very differently from lead-acid batteries, and the rules that apply to one are wrong for the other. Understanding these differences prevents the most common lithium storage mistakes.
The ideal storage state of charge for LiFePO4 cells is 50-70%, not 100%. Storing lithium cells at 100% state of charge for extended periods accelerates a slow form of capacity degradation called calendar aging — the SEI (Solid Electrolyte Interface) layer on the anode grows slightly faster at high SOC, gradually reducing the cell’s capacity to accept charge. This effect is real but modest — the difference between 50% and 100% storage SOC over a 4-month winter storage period is a fraction of a percent of capacity — but it is good practice for the long-term health of an expensive pack.
The practical action: before storage, drive the cart until the battery state-of-charge display or Bluetooth app (Eco Battery B-Plus) shows approximately 50-70%. Then disconnect the pack from the cart’s main circuit to prevent parasitic drain from any always-on accessories (LED indicators, clocks, security modules). Most lithium golf cart packs have a physical disconnect switch or removable connection point for this purpose.
Unlike lead-acid batteries, lithium batteries do not need maintenance charging during storage. The BMS maintains cell voltage balance, the self-discharge rate of LiFePO4 cells is very low (1-2% per month at room temperature), and the chemistry does not sulfate. A lithium pack stored at 60% SOC in a dry, temperature-moderate environment will still be at approximately 50-55% SOC after four months — ready for a single full charge cycle before first use of the season.
The one lithium storage concern in cold climates is temperature. LiFePO4 cells should not be stored below -22°F (-30°C). In typical US winter conditions, even unheated garage storage does not approach this threshold — but for carts stored in outdoor, uninsulated sheds in Minnesota or Canada, the storage environment deserves attention.
The Complete Pre-Storage Preparation Checklist
Storage preparation takes approximately two to three hours for a thorough job. Here is every task in the correct sequence, with the reasoning for each.
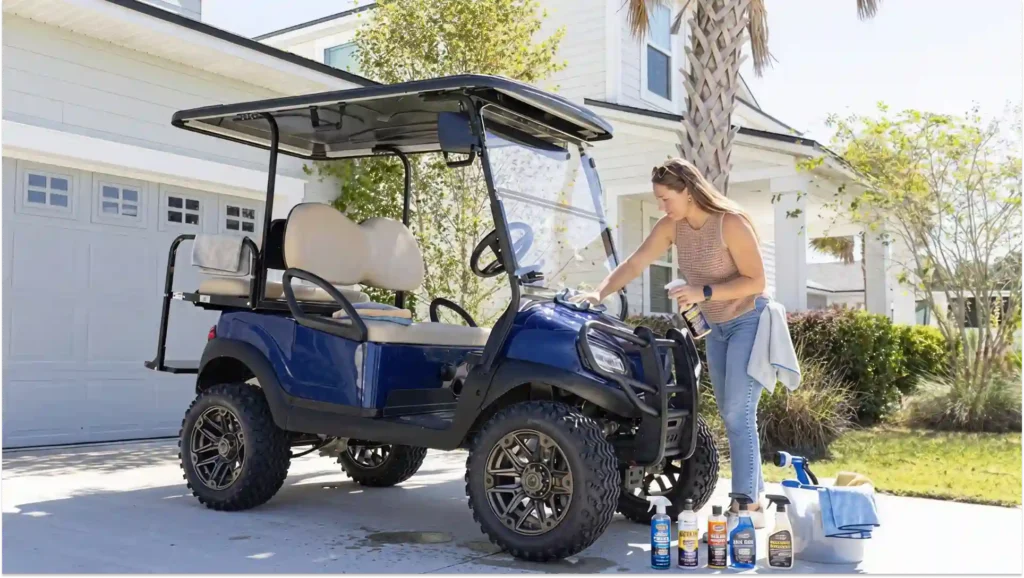
Cleaning and Inspection
- Accumulated dirt, debris, and especially any organic material (grass clippings, leaf matter) traps moisture against metal surfaces and creates the humid microenvironment that rodents prefer for nesting. A clean cart stored dry has significantly fewer problems emerging in spring than a dirty one. Use a hose, car wash soap, and a soft brush. Rinse thoroughly and allow to dry completely before covering — water trapped under a cover is worse than no cover at all.Wash the cart thoroughly.
- Look for any surface rust beginning to develop on steel components. Apply a light coat of penetrating oil (WD-40 or CRC 3-36) to any bare metal areas showing light rust. This prevents the rust from progressing during storage. For the aluminium-framed Club Car models, check for any electrolytic corrosion at dissimilar-metal contact points. Inspect the undercarriage and frame.
- Rubber seals, gaskets, and trim pieces dry out and crack during cold storage. Apply a silicone-based rubber conditioner to seat cushion bolsters, door gaskets (LSV models), and any exposed rubber trim. This maintains flexibility and prevents the cracking that causes appearance and weatherproofing degradation. Check and treat all rubber components.
- Brake drums can develop surface rust during storage that causes the brake shoes to adhere to the drum surface. Before storage, manually engage and release the brake several times to break any early adhesion. A light spray of dry lubricant (not grease) on the brake cable exposed sections prevents cable seizing. Inspect brake cables and drums.
- Cold temperatures reduce tire pressure — approximately 1 PSI per 10°F temperature drop. If storing in a cold environment, inflate tires to the upper end of the recommended range or 2-3 PSI above normal operating pressure to account for the pressure loss during temperature drop. Tires stored at very low pressure for months develop flat spots and can deform. Check tire pressure and adjust to the storage specification.
Electrical Preparation
- For lead-acid: full charge plus equalization, correct electrolyte levels. For lithium: reduce to 50-70% SOC and disconnect from the main circuit. Complete the battery storage protocol described above.
- Apply a baking soda solution to any terminal corrosion, scrub clean, rinse, dry, and apply a heavy coat of anti-corrosion spray or petroleum jelly. Terminal corrosion that is minor in summer becomes significant after months of cold storage — treat it now rather than discovering severely corroded connections in spring. Clean all battery terminal connections.
- This sounds obvious, but is occasionally forgotten. Some older carts have parasitic loads that remain even with the key off — if yours does, identify and address the drain source or physically disconnect the battery pack main connection. Turn the key to the OFF position.
- Apply dielectric grease to any exposed multi-pin electrical connectors — particularly the OBC charge port, any diagnostic port connectors, and accessory wiring connections. Moisture ingress into connectors during storage causes corrosion that produces mysterious fault codes and intermittent failures in the spring. Protect electrical connectors from moisture.
Gas Cart Specific Preparation
Gas-powered golf carts require additional preparation steps beyond electric models, particularly around the fuel system and engine.
- Gasoline degrades significantly in 30-60 days without a stabiliser. Degraded fuel leaves varnish deposits in the carburetor jets and fuel passages that are the primary cause of the ‘engine runs but bogs down’ spring startup problems that require carburetor cleaning. Add Sta-Bil or equivalent fuel stabiliser to a full tank of fresh fuel (not old fuel — stabiliser preserves fuel, it does not rescue already-degraded fuel). Run the engine for 5 minutes to circulate the stabilised fuel through the carburetor. Add fuel stabiliser to the fuel tank.
- Used oil contains acidic combustion byproducts that accelerate corrosion inside the engine during storage. Changing to fresh oil before storage protects the engine internals throughout the storage period. Check the oil level after changing and top up to the correct mark. Change the engine oil before storage.
- Replace or clean the air filter before storage. A clogged air filter from last season does not improve during storage, and cleaning it now prevents a restricted startup in spring. Also, check the air filter housing for any debris or small openings where rodents might nest. Check the air filter.
- If the drive belt shows cracking, fraying, or significant wear, replace it before storage rather than discovering a failed belt during the first spring outing. A new belt is $25-$50 — far less disruptive than a belt failure mid-season. Inspect the drive belt for wear.
- Remove the spark plug, spray two seconds of engine fogging oil into the cylinder, and reinstall the spark plug finger-tight. Rotate the engine by hand (pull the starter cord slowly) to distribute the oil on the cylinder wall. This prevents cylinder rust during storage — particularly important in high-humidity climates. Fog the cylinder with storage oil (optional but recommended for long storage).
Rodent Prevention: The Most Underestimated Winter Storage Problem
Rodent damage to golf carts during winter storage is far more common than most owners realise, and the damage patterns are consistent: nesting material packed around the motor and battery compartment, insulation stripped from wiring harnesses, wire jacketing chewed through (sometimes in multiple locations), and in severe cases, physical damage to hoses and rubber components.
The reason golf carts are attractive to rodents is straightforward: an enclosed storage space with insulating materials (wiring insulation, seat foam, weather stripping), warmth retention from the residual heat of stored batteries, protection from predators, and often access to garage food sources (birdseed, pet food, cereals stored nearby). From a mouse’s perspective, a golf cart in a closed garage is an excellent winter apartment.
The wiring damage is the most consequential. A single chewed wire creates an open circuit fault that takes significant time to locate and diagnose. Multiple chewed wires — the common outcome when a rodent has nested and chewed through a wiring harness — can produce a fault pattern that looks like controller failure, solenoid failure, or a completely dead cart, when the actual cause is several small breaks in different wires that each need individual repair.
Rodent Prevention: The Complete Strategy
Effective rodent prevention requires a layered approach — no single method is reliable on its own, but the combination of physical exclusion, deterrents, and trap placement creates a hostile environment that significantly reduces the probability of rodent damage.
| Prevention Method | Effectiveness | Implementation Details |
| Seal entry points to storage area | HIGH | Walk the perimeter of the storage space and identify any gaps, cracks, or openings larger than 1/4 inch. Mice can enter through gaps as small as a dime. Seal with steel wool packed tightly and covered with caulk, or use metal mesh (hardware cloth) for larger openings. This is the highest-impact single step — if they cannot enter the storage space, they cannot damage the cart. |
| Block cart intake and exhaust openings | HIGH | Stuff clean rags loosely into: (1) the air filter intake on gas carts, (2) the exhaust pipe on gas carts (use a rag or rubber end cap), (3) any large ventilation openings in the battery compartment, and (4) the cart enclosure openings if using an enclosure cover. Use bright-coloured rags so you remember to remove them in spring. |
| Peppermint oil cotton balls | MODERATE | Mice have a strong aversion to peppermint oil. Saturate cotton balls with peppermint oil and place them in the battery compartment, under the seat, and in the footwell. Refresh every 6-8 weeks as the oil evaporates. Not a standalone solution but contributes to the deterrent environment. |
| Wire mesh / steel wool packing | HIGH (specific areas) | Pack steel wool around any wiring harness bundles that are exposed in accessible areas — particularly where wires pass through frame openings or near the battery compartment floor. Mice dislike chewing through steel wool. Change annually as the steel wool rusts. |
| Ultrasonic pest repellers | MIXED | Ultrasonic devices emit high-frequency sounds that some rodents find uncomfortable. Results are inconsistent — effectiveness varies by device quality and rodent species. They do not replace physical exclusion but can contribute to the deterrent layer. Position one in the storage area focused toward the cart. |
| Snap traps / bait stations | HIGH (reactive) | Place snap traps or enclosed bait stations at the perimeter of the storage area and near any known entry points. This addresses rodents that have already entered the space. Check monthly. Essential if you have had rodent activity in the storage area in previous years. |
| Breathable cart cover | MODERATE | A properly fitted golf cart cover adds a physical barrier between rodents and wiring. Use a fabric or breathable cover, not plastic sheeting. Plastic sheeting traps moisture and creates condensation. A good quality fitted cover with tie-downs or elastic hem is worth the investment for winter storage. |
| Remove food sources from storage area | HIGH | Birdseed, pet food, grass seed, and any organic material stored near the cart creates the food incentive for rodent entry. Move all such materials to sealed containers away from the storage area. If the garage has no food sources, it is a less attractive rodent destination regardless of what else you do. |
Moisture Control: Preventing Condensation and Corrosion During Storage
Temperature cycling during winter storage — warm days followed by cold nights — causes moisture to condense on metal surfaces inside the storage space and inside the cart. This condensation accelerates corrosion on terminals, connectors, and bare metal surfaces, and can degrade electrical connections significantly over a four-month storage period even without any liquid water contact.
The moisture problem is worst in storage environments that are not climate-controlled — garages that follow outdoor temperature swings, sheds with poor insulation, and covered outdoor storage. Each temperature drop condenses moisture from the air onto the coldest surfaces. Each warm-up re-evaporates it, only to condense again on the next cold cycle. Over a full winter, a metal surface in this environment can undergo hundreds of condensation-evaporation cycles.
Moisture Control Strategies
Moisture absorbers: Place calcium chloride desiccant containers (sold as DampRid or similar products) inside the covered cart, near the battery compartment, and in the footwell. A single large container lasts 45-90 days in moderate humidity — check and replace as needed. These absorbers capture moisture from the air surrounding the cart, reducing the condensation cycle on electrical components.
Breathable cover selection: The choice of cover material significantly affects moisture outcomes. Breathable fabric covers allow moisture vapour to pass through, preventing the humid microenvironment that develops under impermeable plastic covers. Plastic tarps and polyethylene sheets trap moisture and create condensation that runs down and pools in the battery and wiring areas. A fitted, breathable fabric cover from RHOX or Classic Accessories is the correct storage cover choice. Plastic tarps are not an acceptable substitute.
Storage surface: If possible, store the cart on a clean, dry concrete floor rather than bare earth. Bare earth in a shed or garage releases significant moisture vapour that rises through the cart. A layer of rubber matting or wooden pallets under the cart creates a barrier that reduces ground-sourced moisture exposure.
Ventilation: An unventilated, sealed storage space accumulates moisture from the cart’s own residual warmth, from moisture already in the air, and from the ground. Some air circulation — even a passive vent or a slightly ajar door for part of the storage period — significantly reduces moisture accumulation. Do not seal the storage space completely airtight. The goal is protection from weather, not elimination of air exchange.
Corrosion Prevention Targeting
Beyond general moisture control, specific components benefit from targeted protection before storage:
- Battery terminals and cable connections: Apply anti-corrosion spray or petroleum jelly generously before storage. This creates a physical barrier against the moisture that would otherwise cause the green-tinged corrosion that appears on terminals during storage.
- The charge port: The charge port is a common moisture entry point. Apply dielectric grease to the port pins and use a rubber dust cap if available. Some owners wrap the charge port opening loosely with a plastic bag secured with a rubber band — ensuring moisture cannot enter, but condensation can escape.
- Exposed metal on the undercarriage: A light coat of penetrating oil or chassis wax on any bare metal on the frame underside prevents surface rust from developing during the repeated condensation cycles of winter storage.
- Any recent repair areas where paint has been disturbed: apply touch-up paint or primer to prevent rust initiation at exposed metal. Bare metal in a humid winter environment develops surface rust within weeks.
Choosing the Right Storage Environment: What Matters and What Does Not
The ideal golf cart storage environment is dry, temperature-moderate, secure, and ventilated. In practice, most owners use whatever covered space is available — a garage, a storage shed, a covered carport. Here is how to assess and optimise each common storage environment.
| Storage Type | Battery Risk | Rodent / Moisture Risk | Optimisation Steps |
| Heated indoor garage (climate controlled) | LOW | LOW | Best storage environment. Minimal battery preparation beyond standard protocol. Still seal entry points and use moisture absorbers — even climate-controlled spaces have periodic humidity fluctuation. |
| Unheated attached garage (follows outdoor temps) | MODERATE | MODERATE | Most common scenario. Full battery maintenance charging required. All rodent prevention steps apply. DampRid moisture absorbers essential. Breathable cover required. |
| Insulated storage shed | MODERATE | HIGH | Similar to unheated garage for battery purposes. Higher rodent risk because sheds are less frequently accessed and rodents establish undisturbed nesting. Extra attention to sealing entry points and baiting. |
| Uninsulated metal shed (outdoor exposure) | HIGH | HIGH | Most challenging environment. Significant temperature extremes and condensation cycles. Lead-acid batteries: maintenance charging every 3-4 weeks mandatory. Lithium: ensure temperature stays above -22°F. Double moisture absorbers. Maximum rodent prevention measures. |
| Covered outdoor carport | HIGH | HIGH | Only acceptable in mild climates (above 20°F consistently). High wind and moisture exposure. Requires high-quality fitted cover with straps. Rodent deterrents critical. Lead-acid batteries should ideally be removed and stored indoors. |
For owners storing in high-risk environments (uninsulated sheds or covered outdoor areas in cold climates), consider removing the battery pack from the cart for indoor storage separately. A lead-acid battery pack removed from the cart and stored on a wooden pallet in a temperature-moderate indoor location, connected to a smart maintenance charger, is far safer than the same pack sitting in a frozen metal shed for four months. The inconvenience of removing and reinstalling the pack is modest compared to the cost of replacing a frozen, cracked pack in spring.
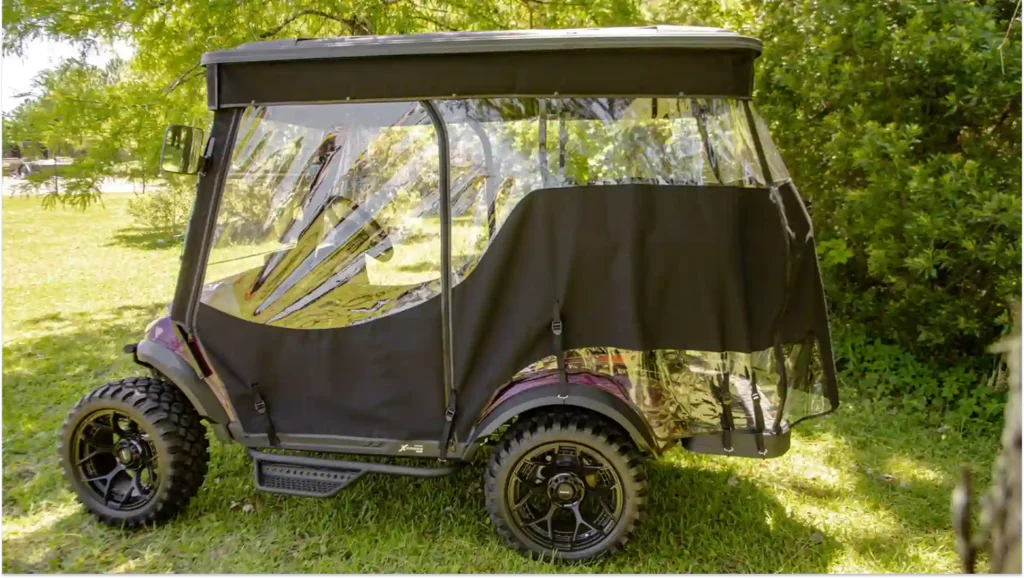
Golf Cart Covers: What to Buy and What to Avoid
A golf cart cover is one of the most purchased golf cart accessories and one of the most frequently purchased incorrectly. The mistakes are consistent: buying an undersized universal cover that does not fit the specific platform, or buying an impermeable material that traps moisture.
| Product Name | Product Type | Price |
|---|---|---|
| RHOX Storage Cover – Cart with 80″ Top (Nylon) | Nylon storage cover | $239.99 |
| Sand Standard Size Storage Cover (Universal Fit) | Universal storage cover | $150.99 |
| Sand Premium Standard Size Storage Cover (Universal Fit) | Premium universal storage cover | $63.99 |
| Red Dot 120-Inch Plus Top Cart Cover | 120-inch plus top cart cover | $176.99 |
| Golf Cart Covers Category | Main category link | Shop all |
What Makes a Good Storage Cover
- Breathable fabric construction: Water-resistant but not waterproof. The cover should prevent liquid water (rain, condensation dripping from rafters) from entering while allowing moisture vapour to escape. This prevents the humidity buildup that causes corrosion. Look for covers labelled as breathable, non-woven fabric, or solution-dyed polyester.
- Platform-specific fit: A fitted cover designed specifically for EZGO TXT, Club Car DS, Club Car Precedent, or Yamaha Drive2 will fit correctly and stay in place. Universal covers are frequently too loose on some platforms, allowing wind entry and pooling of rain in the cover material. The few dollars saved on a universal cover are not worth the fitment problems.
- Elasticised or tie-down hem: The bottom hem of the cover should have an elastic band, drawstring, or tie-down straps that hold the cover snug to the cart body. A loose-bottomed cover flaps in wind, allows rodent entry, and pools water at the base.
- UV resistance: Even in winter storage, UV exposure from light entering through garage windows or a translucent shed roof causes material degradation. UV-stabilised fabric maintains its water resistance and structural integrity longer than non-stabilised materials.
Recommended brands: RHOX (Nivel brand) produces platform-specific fitted covers with good breathability at competitive prices. Classic Accessories golf cart covers are widely available and include platform-specific sizing. Caddytek produces a range of fitted covers for all major platforms. Any of these is a significant improvement over a generic utility tarp.
Spring Recommissioning: Bringing the Cart Back to Full Service
The spring startup procedure is as important as the winter storage preparation. A cart that was properly stored can still develop problems if the recommissioning is done carelessly — particularly around battery charging, brake inspection, and gas cart startup.
The Complete Spring Startup Checklist
- Before doing anything else, look for droppings, nesting material, or chewed wiring. If rodent activity is present, conduct a systematic inspection of all wiring harnesses before attempting to charge or start the cart. A chewed wire during a first charge can produce a short circuit. Remove the cover and inspect for rodent evidence.
- Remove any rags stuffed into air intakes, exhaust pipes, and ventilation openings. Bright-coloured rags are harder to forget — if you used white rags, do a careful inspection. An exhaust plug on a running gas cart is a serious problem. Remove all storage plugs and materials.
- Even with pre-storage treatment, some corrosion may have developed. Clean any terminal corrosion with a baking soda solution, dry thoroughly, and reapply anti-corrosion spray before connecting the charger.Inspect all battery connections for corrosion.
- Before the first charge of spring, check all cell levels and top up with distilled water as needed. During storage self-discharge, the electrolyte level drops slightly. Correct the levels before charging to ensure no cells charge from a low-level state. Check electrolyte levels (lead-acid).
- For lithium carts, reconnect the main circuit connection and check the state of charge via the Bluetooth app or indicator display. If SOC has dropped below 20%, charge to 50-70% before the first drive rather than immediately driving on a deeply discharged pack. Reconnect lithium packs and check SOC via app.
- For lead-acid packs, perform a complete charge cycle with equalization before first use. The storage period will have produced some sulfation, even with maintenance charging — a fresh equalization charge addresses this. For lithium packs, a complete charge to 100% before the first drive of the season is recommended to calibrate the BMS’s state-of-charge estimation. Perform a full charge cycle.
- Apply the brakes firmly from a slow roll and test that stopping feels normal. Surface rust on brake drums that develops during storage can cause the brake shoes to grab unevenly — this clears after a few brake applications but should be confirmed rather than assumed. Check brake cable tension and parking brake function. Inspect the brake system.
- Cold storage reduces tire pressure. Inflate to the correct operating specification before driving. Tires that have been stored at low pressure may have minor flat spots that resolve after warming up. Check tire pressure.
- Take a slow, short test drive of 5-10 minutes before returning to normal use. Listen for any unusual sounds from the brakes, drivetrain, or motor. Check that the cart accelerates smoothly from a stop and that the charger initiates correctly after the test drive. Test drive slowly before full use.
- For gas carts stored with fresh stabilised fuel: choke fully on, start normally, allow to run for 2-3 minutes until fully warmed, then reduce choke. For carts where the fuel stabiliser step was skipped or fuel is known to be old: drain the carburetor bowl, clean the main jet with carburetor cleaner, add fresh fuel, and restart. Gas cart: follow the gas startup procedure.
Storage Considerations by Climate: Not All Winters Are the Same
The storage protocol described in this guide is calibrated for northern US and Canadian winters — temperatures that regularly fall below freezing for extended periods. Owners in different climates face different risks and need to adjust the protocol accordingly.
Mild Winter Climates (Southern US, Pacific Coast, Florida)
In climates where temperatures rarely fall below 32°F and winter storage periods are 0-2 months at most, the battery storage requirements are less demanding. Lead-acid batteries self-discharge slowly enough in mild temperatures that a monthly manual recharge may be sufficient without continuous maintenance charging. Freeze risk is essentially zero. The rodent and moisture concerns still apply — garage storage in any climate presents rodent access opportunities.
For Florida and Gulf Coast owners who store their cart for 4-6 months during summer when the heat makes outdoor driving uncomfortable, the storage protocol concerns invert. Summer storage in Florida means heat management rather than freeze prevention. Ensure the storage space is ventilated rather than sealed — a closed, unventilated garage in a Florida summer can reach 120-130°F, which accelerates battery degradation significantly. Summer storage of lead-acid batteries should include more frequent electrolyte checks (every 2 weeks in high heat) and shade or ventilation for the storage environment.
Cold Northern Climates (Minnesota, Canada, Mountain West)
In climates with extended freezing periods and potential temperatures well below 0°F, the storage protocol needs strengthening:
- Lead-acid batteries: Maintenance charging every 3-4 weeks rather than 4-6 weeks. If the storage space regularly reaches below 0°F, consider removing batteries for indoor storage separately. A frozen battery is a destroyed battery.
- Lithium batteries: Monitor that the storage temperature stays above -22°F (-30°C). Most garage and shed storage in the US stays above this threshold even in the coldest winters, but verify for your specific location. Outdoor or uninsulated storage in northern Canada may warrant battery removal for indoor storage.
- Gas cart fuel system: Fuel gelling in very cold temperatures is a risk for inadequately stabilised fuel. Use a winter-grade fuel stabiliser and ensure the tank is full (less air space = less water condensation in the tank) before storage.
What Spring Reveals About Winter Storage: Patterns We See Every Season
After years of fielding spring startup calls, three storage failures account for the overwhelming majority of preventable problems that we diagnose.
The first is the discharged winter battery. An owner reports that the cart seems dead — charger connected, nothing happens, or the cart moves slowly and dies within minutes. Seventy percent of the time, this is a battery pack that was stored insufficiently charged or without maintenance charging, developed significant sulfation over winter, and now cannot accept a proper charge. Sometimes a deep conditioning sequence (as described in our Battery Reconditioning Guide) recovers partial capacity. Often, the pack needs replacement. The fix is always the same in retrospect: full charge and maintenance charging before and during storage.
The second is rodent wiring. An owner finds multiple fault codes, intermittent response, or a cart that completely refuses to operate. Systematic wiring inspection finds chewed insulation in two or three locations in the main wiring harness. Each location requires splicing and heat-shrink repair, plus an inspection of the surrounding wiring for additional damage that is not immediately obvious. This takes 2-4 hours of diagnosis and repair work. Prevention: 30 minutes sealing the storage space entry points in November.
The third is the spring overwater problem. An owner, knowing the batteries need attention after winter, checks the electrolyte levels and finds them low. They fill generously before connecting the charger. The charge cycle pushes the now-overfilled electrolyte out of the cells, corroding the terminals and cable connections. The correct protocol — check levels, top up to the correct mark (not the top), then charge — would have prevented this. Fill after charge in spring, just as in regular maintenance.
Frequently Asked Questions
Can I leave my golf cart plugged in all winter?
For carts with a smart automatic charger with a maintenance or float mode, yes — leaving it connected all winter is actually the recommended approach for lead-acid batteries. The charger provides maintenance charging that prevents self-discharge and sulfation. For carts with an older OEM charger that does not have a float mode, leaving it connected risks overcharging the pack during extended connection. Check your charger’s capabilities before deciding on continuous connection.
What happens if I store my lead-acid batteries without charging them first?
Storing a discharged lead-acid battery pack causes continuous sulfation throughout the storage period. The lead sulfate crystals that form during discharge grow and harden progressively. After four months of discharged storage, the sulfation may be severe enough to prevent normal charging — the charger will run, but the pack will not accept charge normally. Depending on the degree of sulfation, a recovery conditioning sequence may restore partial capacity, or the pack may require replacement. Always charge fully before storage.
Do lithium batteries need maintenance charging during winter storage?
No. LiFePO4 batteries have a very low self-discharge rate (1-2% per month at room temperature) and do not sulfate. A lithium pack stored at 50-70% SOC with the main circuit disconnected will still have 40-60% SOC after four months of winter storage — well within normal operating range. Connect to a charger for a full charge before the first spring drive, but no maintenance charging during storage is required.
What should I do if I find rodent damage to my cart’s wiring after winter?
First, conduct a systematic visual inspection of every wiring harness section before attempting to power the cart. Do not connect the charger or turn the key until you have identified all damaged sections — a shorted wire during charging can damage the controller or OBC. Once all damage locations are identified, splice and insulate each chewed section with adhesive-lined heat-shrink tubing. Test each repaired section for continuity before reconnecting the battery. If wiring damage is extensive (more than 5-6 locations), have a shop evaluate whether a harness replacement is more practical than multiple individual splices.
How long can a golf cart sit without being driven?
With proper storage preparation and maintenance charging, an electric cart can sit for 4-6 months without significant damage. Without maintenance charging, the practical limit before battery damage begins is 6-8 weeks for lead-acid. Gas carts can sit for 2-4 months with stabilised fuel without carburetor issues, but longer without stabiliser produces varnish deposits. At the extreme end, a properly prepared cart in a climate-controlled environment can sit for 12-18 months without major issues — but this requires a deliberate storage protocol, not casual abandonment.
Should I disconnect the battery cables during storage?
For lead-acid batteries, disconnecting the main cables prevents any parasitic drain from accessories but means you cannot keep a maintenance charger connected without reconnecting. If using continuous maintenance charging, keep cables connected. If performing manual monthly recharges, you can disconnect between charges. For lithium batteries: yes, disconnect the main circuit connection to prevent the very small parasitic draw from always-on BMS circuitry from slowly draining the pack over a multi-month storage period.
The Practical Takeaway: Two Hours of Prevention, Zero Hours of Spring Repair
Winter golf cart storage done correctly takes approximately two to three hours of preparation time and a monthly 20-minute check on the battery maintenance charger status. Done incorrectly, it produces three to eight hours of spring diagnostic and repair work, often followed by a $1,000+ battery pack replacement.
The hierarchy of storage priorities: batteries first, rodent prevention second, moisture control third, everything else fourth. A cart with dead batteries or chewed wiring from winter storage creates cascading problems that take the whole spring to resolve. A cart with minor surface rust and a slightly less perfect coat of wax, but healthy batteries and intact wiring, is ready to drive in 20 minutes.
Work through the pre-storage checklist in this guide before the first frost reaches your area. The timing matters — it is easier to prepare for storage while the weather is still pleasant and the cart is accessible than to rush through the procedure in cold weather after putting it off. Schedule two hours in October for complete preparation, confirm the maintenance charger is connected and running, and the spring recommissioning will be a formality rather than a repair project.